Categories
This is where Categories and Products are managed.
- Summary
- Categories
- Workflows - Categories
- Dynamic Categories
- How to resequence Products within Categories
- Managing Products in Bulk
- Deleting a Product
- Copying a Product
- How to make bulk changes to Products from the Category screen in the CMS
- Products
- Summary
- Product
- Description
- Delivery
- Suppliers
- Media
- Categories
- Attributes
- Collections
- Addons
- Related
- Options
- Customisation
- Bundle
- Booking
- Inventory
- eBay
- FAQs
- Workflows - Products
- Definitions
Summary
From here you can add, edit and delete Products & Categories.
You can revise the order of both by using your mouse. This will affect how they are displayed in the main menu and on all pages.
Key to icons
![]() = is live
= is live
![]() = is disabled
= is disabled
![]() = archived (a Dynamic Category with no products)
= archived (a Dynamic Category with no products)
![]() = a Dynamic Category
= a Dynamic Category
![]() = edit
= edit
![]() = delete
= delete
![]() = copy
= copy
![]() = has sub-categories
= has sub-categories
![]() = no sub-categories
= no sub-categories
![]() = missing image
= missing image
![]() = featured product
= featured product
![]() = home page product
= home page product
It is also possible to Show/Hide Disabled Items on this screen.
Deletion may have serious irreversible impact on your reporting, stock and allocation; Iconography always recommends disabling in the first instance.
Channels
Within the Category edit screen, each Category may be enabled for alternative marketplaces. ![]() = enabled for Google
= enabled for Google
![]() = enabled for eBay
= enabled for eBay
![]() = enabled for Amazon
= enabled for Amazon
Categories
Summary
From this screen you can manage your Category details. It can be used to add a new Category, or amend an existing one.
Categories are used for a variety of purposes:
- Creating a hierarchy of web products (also used in the POS)
- Reporting purposes
- Powering the main menu on the website
- Allowing the user to create content based pages
Setup
You can also amend the Meta Tags for the Category from this page.
Category Details
| Field | Purpose |
| Category Name* |
The name of the Category
This will also be used as the H1 text, to define the default URL and will be the default for the Meta Tags |
| Alternative Short Name |
If used, this will overnight the Category name in the main menu, allowing you to save space, e.g. 'Living Room' becomes 'Living'
The Category Name will still be used as the H1 text, to define the default URL and will be the default for the Meta Tags
Optional field |
| Category Parent |
Select the Parent Category from the drop down
This allows you to take a Sub-Category and make it a top level Category, or alternatively, to take a top level Category and turn it into a Sub-Category
Linked Products will be automatically updated |
| Product Assignment |
Choose between:
Defaults to Manual |
| Live |
Determines whether a Category is visible
Defaults to No for new Categories |
Layout options
| Field | Purpose |
| Display Content |
Choose the types of content you want to display on this page
By default, all are enabled |
| Include Sub-Category Products? |
If you enable this, the Category page will show Products which have been assigned to its Sub-Categories
Defaults to no |
| Show Swatch Previews? |
Enable to show Swatch Previews on this Product Listing Page |
| Product Layout |
Determines the way in which Products will be displayed on your website in desktop mode on the Product Listing Page, if this Category has been enabled to show product content (see above)
Choose from
Defaults to 3 column |
| Default Sort Order |
Choose the Default Sort Order for Products within this Category - choose from:
Defaults to Manual |
| Hide Left Navigation |
Choose to show the Filters on the Product Listing Page, or to hide them behind a button
If the latter, they will slide out when selected
More detail available here
This is required if you want to enable header overlap on Hero and Video content blocks |
| Hide Page Title |
Hide the H1 text from the Category
Not recommended unless you add H1 text within the Category Content
This is required if you want to enable header overlap on Hero and Video content blocks |
| Display sub categories as pill buttons? |
If toggled, this will show sub categories as pill buttons
See here for an example of how this displays |
| Pill button heading |
Enter a heading to be used with Pill Buttons |
Images
| Field | Purpose |
| Category Image |
Upload an image to be used as the Sub-Category tile throughout the website
If not uploaded, IXO Commerce will use the image from a Product assigned to that Category |
| Size | Use this to determine the size at which the Sub-Category tile will be displayed throughout the website |
| Main Menu Image |
Upload an image to be shown within the main menu on the website
These may only be uploaded to top level Categories |
| Menu Image Link URL | Add a URL, which will turn the Main Menu Image into a button |
Third-Party Category Mapping
Use this section to map your Category for integrations. These options will only be visible if you have these integrations enabled.
| Field | Purpose |
| Find matching Categories |
Use this to update the contents of the 3rd party category drop downs below
Defaults to Category Name |
| Google Shopping Category |
Use this to select the Google Shopping Category
This will be used when editing the Product |
| eBay Category |
Use this to select the eBay Category
This will be used when editing the Product |
| Amazon Category |
Use this to select the Amazon Category
This will be used when editing the Product |
Additional Options
| Field | Purpose |
| Footer Text | Text to be shown just above the footer on the Category page |
Category Content
This uses IXO Commerce's Modular Block system to allow you to manage your content.
If your content is not showing, please ensure that Content is ticked under Layout Options.
Assignment
Manual
Products may be assigned to Categories manually, either in bulk via the CSV Import/Export, or alternatively on the Categories tab of the Product.
Dynamic
If a Category is set to Dynamic assignment in the Category Details section, then product assignment will be rule based.
Workflows - Categories
Dynamic Categories
How to resequence Products within Categories
Products can be re-sequenced manually from within the CMS by following these simple steps.
1. Navigate to your CMS.
2. Click "Categories" under Catalogue.

3. Find the appropriate category. In this instance we are using "Living Room".

4. Select the appropriate sub-category(s). In this instance we are using "2 Seater Sofas".

5. When the products are listed, click "Show All".

6. After clicking "Show All", you will now be able to re-sequence the products by dragging and dropping to a new position. We will move "Harold Chaise Sofa" to the top.

7. We will also move "Orla Kiely Mimosa Small Sofa".

8. Once you are happy with the new sequence, you can simply return to the parent category, which will save the order of products.

Managing Products in Bulk
Deleting a Product
When deleting a product, this action will also delete all associated stock.
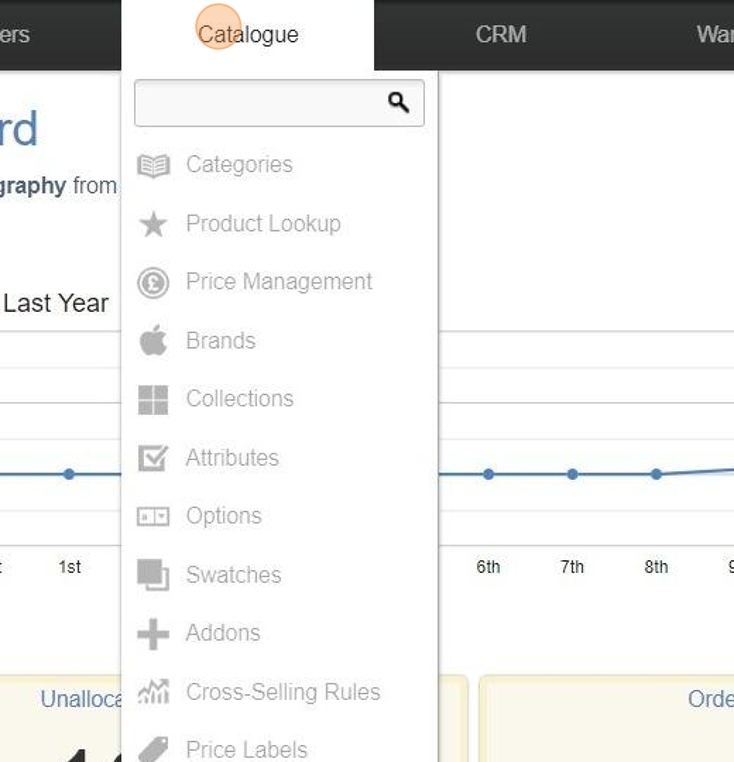
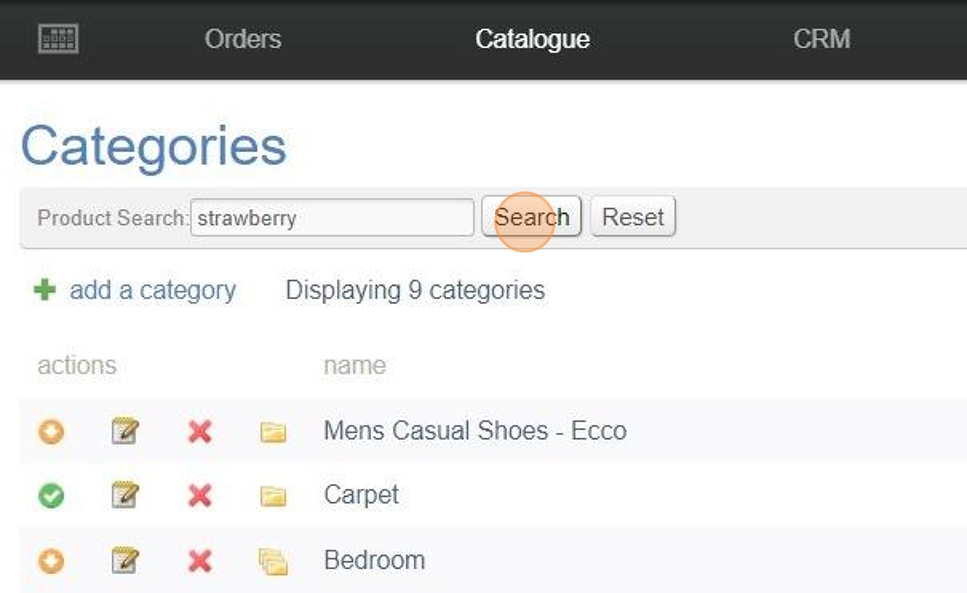
1. Click "Catalogue"

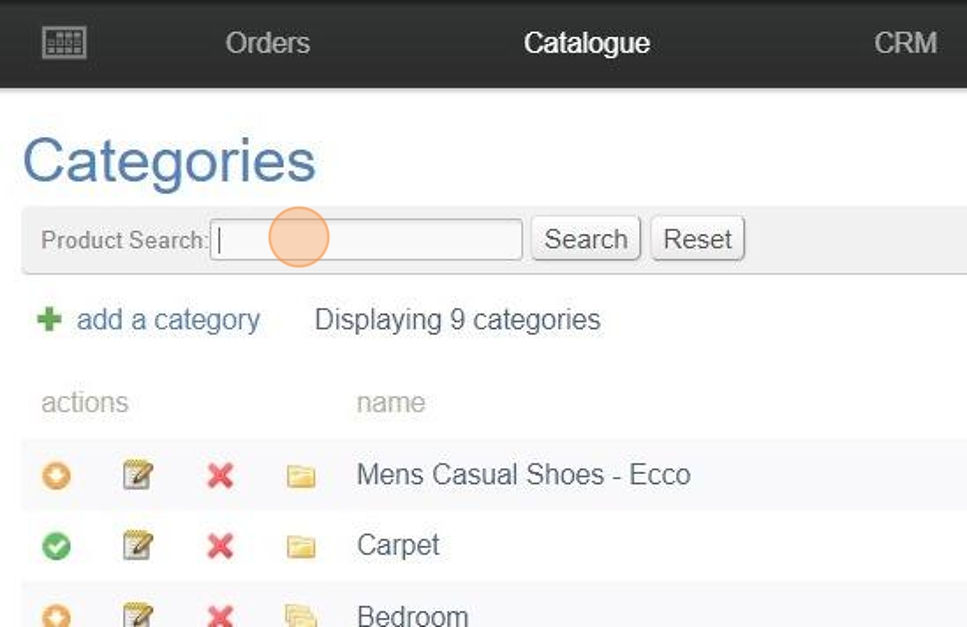
2. Click the "Product Search:" field.
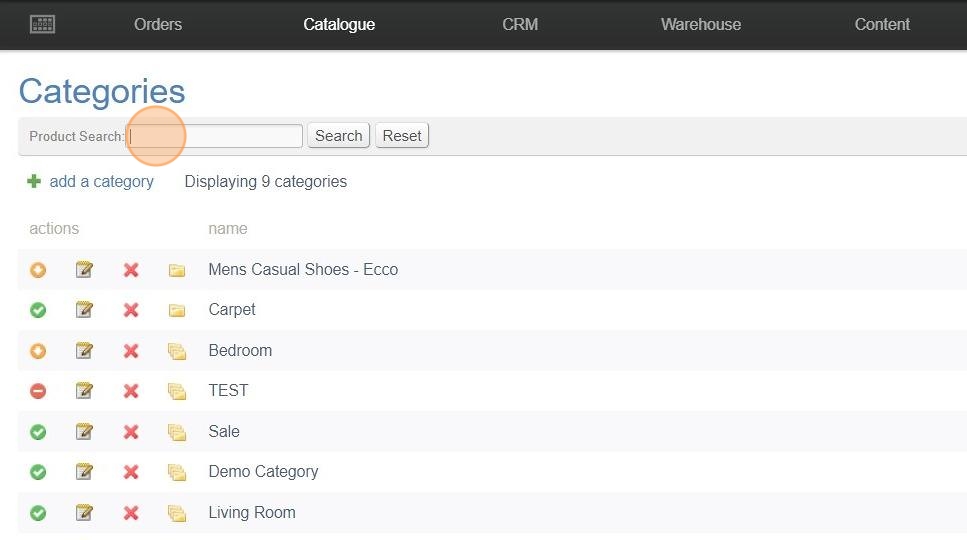
3. Type the product you are looking for in to the search field. In this example we've used "strawberry".
4. Click 'Search'

5. Click the 'Edit' icon
6. Scroll to the bottom of the page and click "delete product"

7. A popup will open asking if you are sure you want to delete this product - if you are happy, click 'OK'

8. You will receive a confirmation message in the top right of the browser advising 'Product was deleted'

Copying a Product
1. Click "Catalogue"
2. Click the "Product Search:" field.
3. Type the product you are looking for in to the search field. In this example we've used "strawberry".
4. Click 'Search'.
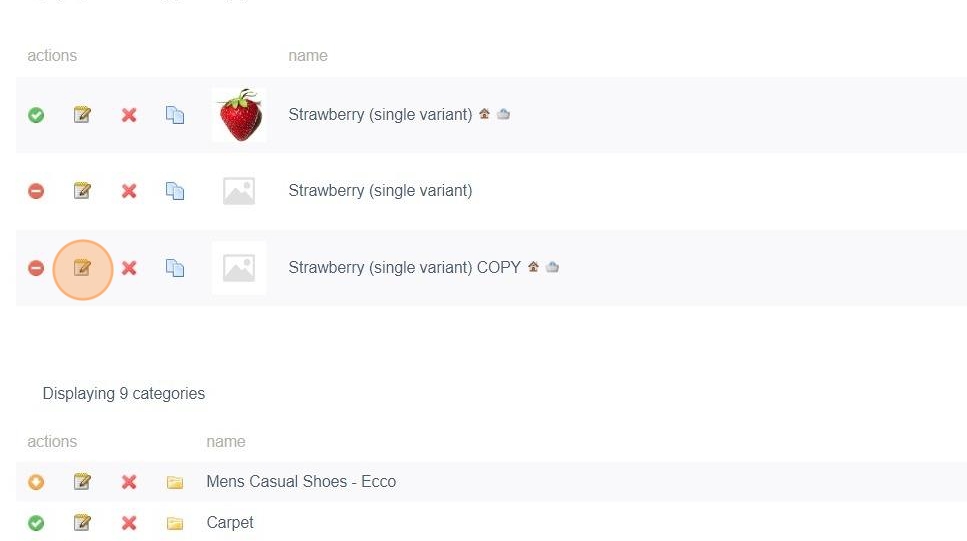
5. Once you've found the product you wish to copy, click the blue copy icon.
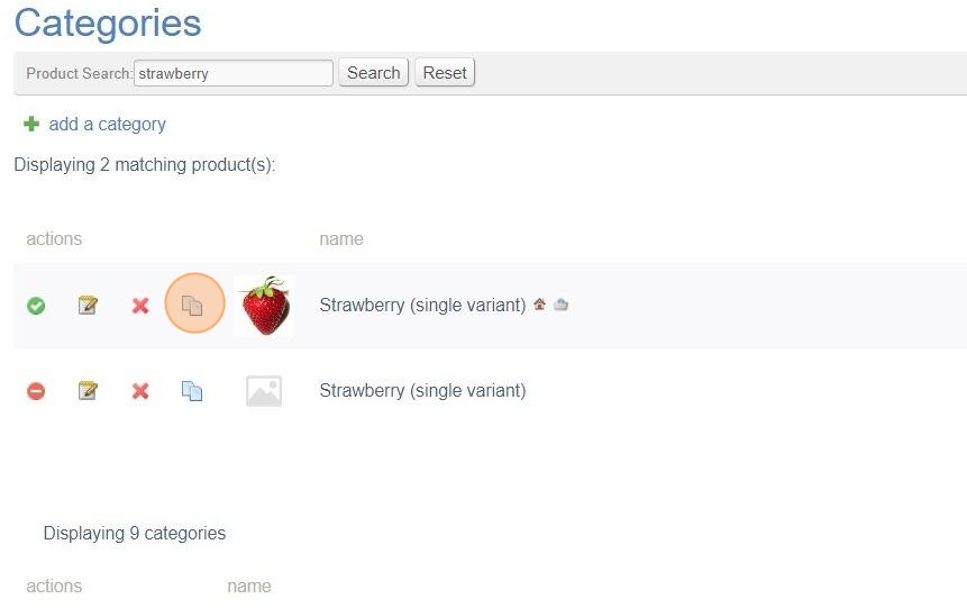
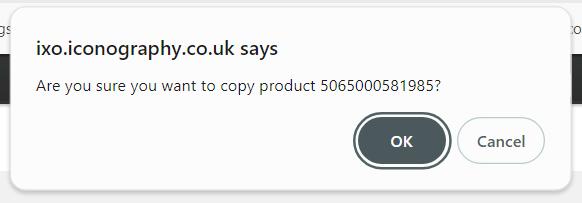
6. You will receive a popup asking if you are sure you want to make a copy. If you are happy, click 'OK' to continue.
7. A copy of the product will now be created. It will have the same name with a 'COPY' suffix.

How to make bulk changes to Products from the Category screen in the CMS
tick boxes
Products
Summary
From this screen you can view and amend information stored about a product.
This screen is separated into individual tabs:

Data entered here will be visible to the customer on the website.
This section allows products to be edited individually; editing in bulk is done with other tools, such as the CSV Upload or the Bulk Updater.
Deletion may have serious irreversible impact on your reporting, stock and allocation; Iconography always recommends disabling in the first instance.
Product

This section is used to control the basic setup of the Product, including statuses, visibility, overlays and other core settings.
Many of these fields are optional, and will either be left blank or set to a default during product setup. Mandatory fields and default values are marked with a *.
You can also update Meta Tags from this tab.
This section allows products to be edited individually; editing in bulk is done with other tools, such as the CSV Upload or the Bulk Updater.
It is also possible to delete the current Product from this screen. When deleting a product, this action will also delete all associated stock.
Setup
Product Overview
This is the basic information about the product.
| Field | Purpose |
| Product Name* |
Displays as the page title (also known as the H1 Text) and is also output on Product Listing Pages, as well as being the primary field for search results
Also used as the Meta-Title by default |
| Product Type |
Choose from these options:
The Product Type will be locked after product creation, except when creating Standard products. For them, it will be changed automatically if Customisations are added to the Product, which would convert it to 'Made to Order' |
| Live |
Choose from these options:
|
| Buy Online |
Choose from these options:
|
| Product Visibility | By default, all products will be visible on your website, but this setting allows you to determine visibility of the product within the POS, or across multiple websites |
| Trade Only | If enabled, the product page will only be accessible to a customer who has logged into a confirmed Trade Account |
| Supplier |
This will allow the user to select a Supplier
Note: if your system is enabled for multiple suppliers, there will be a separate Suppliers tab |
Reference Codes
Reference codes are used in Reporting and Purchase Ordering.
| Field | Purpose |
| Department Code | This powers the Sales by Department report |
| Nominal Code | This field typically forms part of an integration with an accounts package |
| Product Reference | The Product Reference is used as a search field, but it is also used to link similar products together, e.g. separate products that are versions of the same item |
| Manufacturer's Product Name | If populated, this will replace the Product Name on all Purchase Orders |
Details
These add additional information to the Product.
| Field | Purpose |
| Brand | This adds a Brand to a product |
| Condition | Choose if a product is 'New' or 'Used' |
| Colour | Define a product's Colour |
| Merge Tag Title |
The title used on linked eCommerce Products
Used in Conjunction with Product Reference
Note that this field is optional for linked Products |
| Merge Tag |
The label used on linked eCommerce Products
If multiple Products have the same Product Reference, they will be linked to the eCommerce Customer if a Merge Tag Title and Merge Tag are entered
Used in Conjunction with Product Reference
Note that this field is mandatory for linked Products |
| Warehouse Note | This will output on Picking Lists |
Display Options
These will alter how a product will display
| Field | Purpose |
| Overlay Graphic | Use this to manually assign a Product Overlay |
| Display Variants As |
This alters how Variant Options will be displayed on the Product Detail Page - choose from:
|
| Retail Price Label | Set a Retail Price Label (this will override any Price Label set at Brand level) |
| Special Offer Price Label | Set a Special Offer Price Label (this will override any Price Label set at Brand level) |
| RRP Label | Set an RRP Price Label (this will override any Price Label set at Brand level) |
For Exports
Use this to define essential information for exporting your products.
| Field | Purpose |
| Commodity Code | Enter the Commodity Code of the product |
| Country of Origin | Choose the Country of Origin from the drop down |
Other Options
Choose from other options available.
| Field | Purpose |
| Home Page | Toggle to feature the product on the Home Page |
| Category Page | Toggle to feature the product on Category Pages |
| Checkout | Toggle to feature the product at the Checkout |
| Disallow Discounts |
Toggle to exclude the product from all promotions
(this will not exclude the product from manual discounts or special offer prices) |
| Exclude from Finance |
Baskets that include this Product will not be permitted to checkout with finance (eCommerce) |
| Use Swatch Wizard | Toggle to enable the Swatch Wizard |
| Combine variant and swatch selection in Swatch Wizard if applicable (enables "multiswatch") |
Toggle to combine variants within the Swatch Wizard
This will not be available if multiple layers of Variant option are on a product, e.g. 'Size' and 'Colour'
This will not be available if any live Variant has no Customisations |
| Show swatch panel (Applies to "Swatch Wizard" only) |
Toggle to enable the Swatch Panel |
| Enable Swatch Request Popup |
Toggle to enable the Swatch Request Popup
(Swatches must be enabled for the Swatch Request tool for this to function) |
| Allow VAT Exemption |
Toggle to enable VAT Exemption against this Product |
| Enable StoreFeeder Sync |
Enables this product for the StoreFeeder Sync (3rd party marketplaces)
Limited to Standard products only |
Description

This tab is used to amend and edit content on the product page, e.g. descriptions, summaries and other tabs.
During setup, these fields are optional, and will be left blank if not populated.
This section allows products to be edited individually; editing in bulk is done with other tools, such as the CSV Upload or the Bulk Updater.
Setup
| Field | Purpose |
| Product Summary | This field allows for a simple summary of the product, with simple formatting |
| Product Description | This field controls the Product Description; formatting may be added to this using the controls at the top of the screen |
| Custom Tab Name (multiple) |
If populated, this will add a new product information tab onto the product page; this field will provide the title of that tab
This will display in the same manner as a Global Tab |
| Custom Tab Content (multiple) | This will form the content of a custom tab; this is populated as per the Product Description |
| Private Notes | These notes are only visible within this tab |
Delivery

This tab is used to setup and edit delivery options for a product.
During setup, these fields are optional, and will follow defaults set up within the Postage section.
This section allows products to be edited individually; editing in bulk is done with other tools, such as the CSV Upload or the Bulk Updater.
Setup
| Field | Purpose |
| Delivery Details (in stock, optional) |
Text entered in this field will display to the customer on the website if the product has available free stock
If left blank, this will default to 'In Stock' |
| Delivery Details (out of stock, optional) |
Text entered in this field will display to the customer on the website if the product does not have available free stock
If left blank, this will default to 'Out of Stock', or, if enabled for allowbackorder on the Inventory tab, it will default to 'Available (allow XXXXXX days for delivery)' |
| Postage Methods |
Use the tick boxes to select Postage Methods |
| Private Notes | Use the tick boxes to select excluded Postage Zones |
Suppliers

This section is used to add Suppliers for a product. If not manually set, the default is to apply none.
This section allows products to be edited individually; editing in bulk is done with other tools, such as the CSV Upload or the Bulk Updater.
You may use the tick boxes to select all of the Suppliers which are available for this product.
This section will only be visible if your system is enabled for Multiple Suppliers - if it has not, the Supplier will be determined via a drop down on the Product tab
Preferred Supplier is used when automatically creating Purchase Orders for this product; if Multiple Suppliers are enabled for a product, the system will default to that Supplier
Media

This tab is used to setup and edit media for a product. If not manually set, the default is to apply none; a 'missing image' image will be shown instead.
This section allows products to be edited individually; editing in bulk is done with other tools, such as the CSV Upload
Setup
Product Images
These should be uploaded via the drag and drop tool - simply drop files to upload them.
Images which have a green header will be live and visible to all customers; those with an orange header will be Variant only images, and will not be visible to customers. To view these, each image must be linked to a specific Variant on the Inventory tab, or linked to a specific Customisation. That image will be shown to the customer if they select that Variant via the option buttons or drop down selector.
Images may be edited individually.
| Field | Purpose |
| Image |
Use this to upload a replacement image |
| Image Alt |
Enter text here that would describe the image; this is used by search engines
This will default to the name of the image file that you uploaded |
| Display |
Yes - make the image live No - make the image a secondary image (see above) |
| Colour |
Select the colour that most closely defines this image - this will then be used on Product Listing Pages when the customer uses 'filter by colour'
Please note that each colour may only be assigned to one image per product |
| Delete this content | To delete, tick this box, and then press update |
Lifestyle Images
These should be uploaded via the drag and drop tool - simply drop files to upload them.
Lifestyle Images will be displayed on the Product Detail Page, below the product description.
| Field | Purpose |
| Image |
Use this to upload a replacement image |
| Image Alt |
Enter text here that would describe the image; this is used by search engines
This will default to the name of the image file that you uploaded |
| Delete this content | To delete, tick this box, and then press update |
PDF Files
Use this to upload a PDF; a link to that PDF will be displayed on the Product Detail Screen.
| Field | Purpose |
| PDF File |
Use this to upload a file |
| PDF File Link Text |
Text entered here will be the link text shown to the customer on your website
This will default to the file name, if left blank |
Video
You can add videos from either YouTube or Vimeo.
| Field | Purpose |
| Video Type |
Use this to determine the type of video (Youtube/Vimeo) |
| Video ID |
Enter the ID of the video that you want to attached to the product
You can find the video ID from the URL:
https://www.youtube.com/watch?v=dQw4w9WgXcQ
Portrait videos are not supported at this time |
Banners
Use the tick boxes to select Banners to display on this Product Detail Page.
Categories

This section is used to add Categories for a product. If not manually set, the default is to apply none.
This section allows products to be edited individually; editing in bulk is done with other tools, such as the CSV Upload
You may use the tick boxes to select all of the Categories which are applicable for this product.
Attributes
This section is used to add Attributes to a product. If not manually set, the default is to apply none.
This section allows products to be edited individually; editing in bulk is done with other tools, such as the CSV Upload
You may use the tick boxes to select all of the Attributes which are applicable for this product.
Collections

This section is used to add Collections to a product. If not manually set, the default is to apply none.
This section allows products to be edited individually; editing in bulk is done with other tools, such as the CSV Upload
You may use the tick boxes to select all of the Collections which are applicable for this product.
Addons

This section is used to add Addons to Variants; it is possible for each Variant on a product to be assigned a different combination of Addons. If not manually set, the default is to apply none.
This section allows products to be edited individually; editing in bulk is done with other tools, such as the CSV Upload or the Bulk Updater.
You may use the tick boxes to select all of the Addons which are available for each Variant.
Related

This section is used to select Related, Upsell and Basket Upsells for Products and Variants. If not manually set, the default is to apply none.
This section allows products to be edited individually; editing in bulk is done with other tools, such as the CSV Upload or the Bulk Updater. These may also be controlled through Cross-Selling Rules.
You may use the tick boxes to select all of the Related, Upsell and Basket Upsell Products which are available.
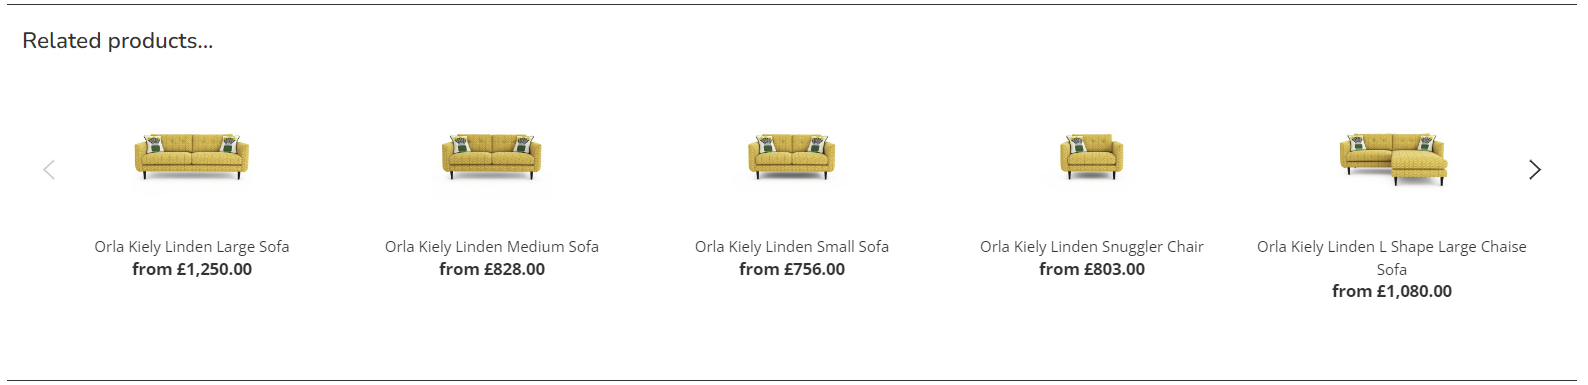
Related Products
These are similar to a 'you may also like', and are displayed below the product description on the Product Detail Page.
Upsell Products
These are typically simple products, which should be single click upsells, e.g. scatter cushions or a basketball upsold to a pair of trainers. These will display near the add to basket button of the Product Detail Page.
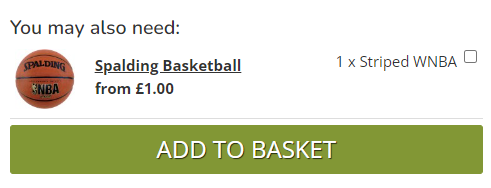
Made to Order and Bundle products can not be upsells; due to the complexity of these products, they can not be single click adds to basket. Products with multiple variants are not recommended for Upsells - use Basket Upsells instead.
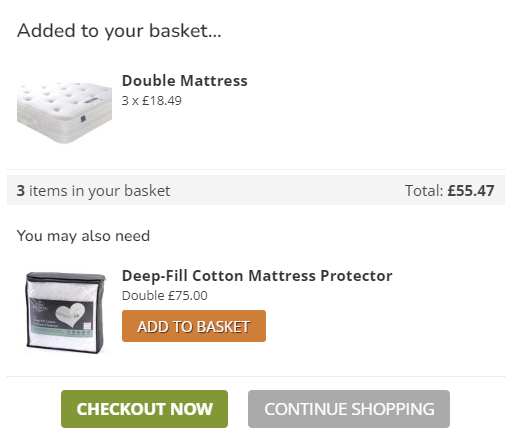
Basket Upsells
These are Variant to Variant upsells, and are applied to the add to basket pop up. Once an item has been added, the platform knows which Variant has been selected, which allows for dynamic upselling.
When setting these up,
A perfect use for this would be upselling a 'double' mattress protector to a customer who has bought a 'double' mattress, or 'size 10' socks to a customer who has bought 'size 10' shoes.
Made to Order Upsells
Made to Order and Bundle products can not be quick upsells; due to the complexity of these products, they can not be single click adds to basket.
It is possible to upsell Made to Order Products (e.g. with Customisations), if the original Product is also a Made to Order item.
For example, a customer seeks to purchase a Divan in Pink Velvet; you may wish to upsell a Headboard Product in the same colour. Both items are Made to Order. If the Headboard is linked to the Divan as an upsell, and the Divan is set to use the Swatch Wizard, then the customer will be asked to choose and configure upsells as part of the buying journey.
FAQs
Why isn't my Upsell showing in the Add to Basket Popup?
There may be several answers for this:
- The upsell is a Made to Order Product
- The upsell is unavailable
- The upsell is already in the Customer's basket
- The upsell relates to another item in the Customer's basket, but not the one that they just added
Options

This section is used to setup and edit Variant Options and Swatches.
it is essential that Options have already been setup.
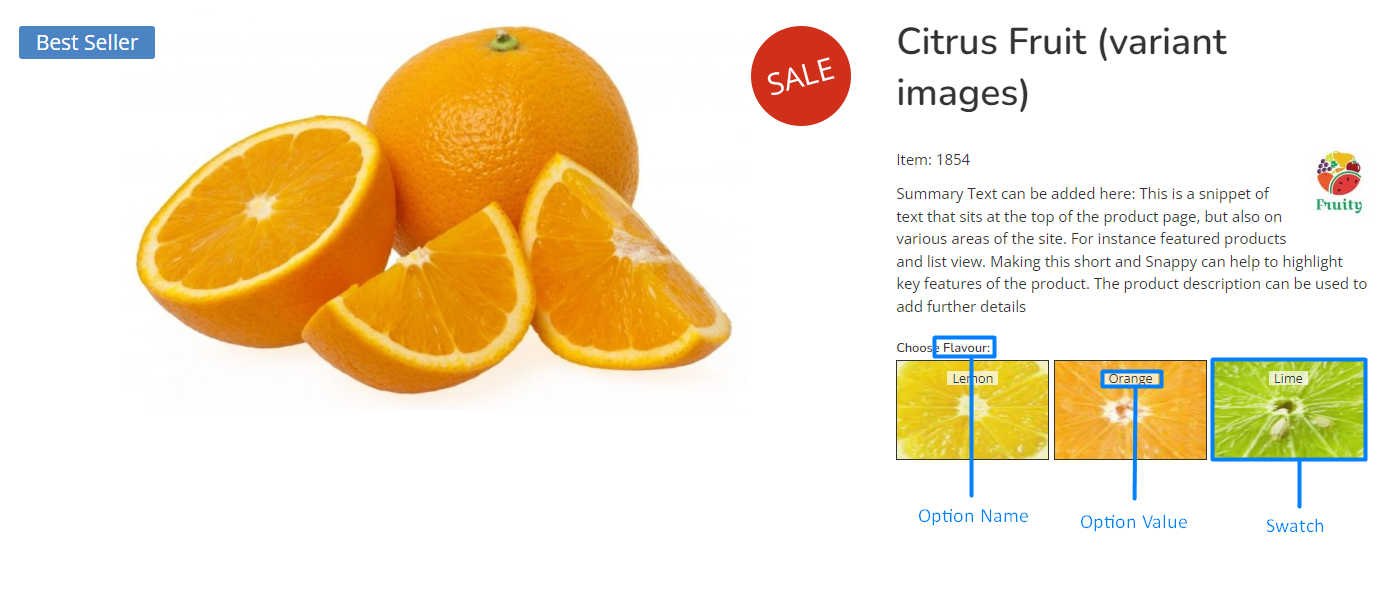
Setup
Select an Option from the drop down. This will be your Option Name, e.g. 'choose flavour'
Below this, press the 'add' button to setup Variant options. Enter text into the field provided, e.g. 'Orange' or 'Lemon'.
You can also select a Swatch, if they have already been setup.
As standard, you can set up three levels of Variant Options.
How Options display
Customisation

This tab allows you to manage Customisations; these are complex options where their number and/or complexity mean that creating individual Variants for each potential combination is impractical.
To manage Customisations, the product must be set as 'Made to Order' on the Product tab
Potential Uses
There are a wide variety of potential use cases, as well as different solutions to the problem of product setup
- Combinations of multiple options, e.g. 'Choose Colour', 'Choose Size', 'Choose Feet', 'Choose Drawers', 'Choose Tension', all on a single product
- Visual representation of options via Swatches
- Parent and Child options, e.g. customer chooses 'with drawers' (yes/no), with a subsequent set of options that only display if they select 'yes'
- Addition of personalisation, e.g. a handstitched name on the back of a football kit
Pricing
Customisations may be added at various price points
- Options with a surcharge of a fixed monetary value, e.g. +£15 to add personalisation
- Options with a surcharge as a percentage of the total value, e.g. +10% to have the product gold plated
- Options with no cost implication, e.g. the cost of the option is built into the variant
Setup
Customisation is applied individually to each Variant.
Managing Customisations
| Field | Purpose |
| Option |
This is the Option Name, e.g. 'choose colour'
Requires the Option to be setup prior to the Customisation |
| Top Level Option |
If unticked, this option will be a Child Option, and will only be selectable if its parent has been selected
This defines whether the option defaults to yes |
| Child Option | These tick boxes will only be visible if another Option has been set as a Child Option; you will then be able to link Child Options to specific Option Values |
| Value |
This is the Option Value, e.g. 'pink' or 'green'
If Customisations are setup via the Swatch Assignment tool, this will default to the name of the Swatch |
| Code |
This is the option code, and is used as an identifier
Defaults to blank |
| Price + £ | Additional value to be added to the Retail price of the Variant |
| Offer + £ |
Additional value to be added to the Special Offer price of the Variant
This will only apply during a Special Offer period, as defined by the Variant |
| Cost + £ | Additional value to be added to the Cost price of the Variant |
| Price + % | Additional percentage to be added to the Retail price of the Variant |
| Swatch | Choose the Swatch that will display with this Option Value |
| Variant Image | Select a linked Variant Image that will display within the Swatch Preview Panel |
| In-Store POS Only | Toggles whether this particular Customisation Value is available to eCommerce Customers |
| Favourite |
Determines whether this shows as a Swatch Preview
Only applies if the Customisation has a Swatch |
You may also copy options from one Variant on a Product to another Variant on the same Product.
Bundle

This tab is used to setup and manage the contents of a Bundle. A Bundle is a composite product made up of multiple simple Variants (e.g. Variants without Customisations).
This tab will only show if the Product Type has been set to Bundle on the Product tab
Setup
Pricing for Bundles is more complex than for simple Variants. The total price for a Bundle will be the sum of all of the Bundle Contents plus any additional pricing set at the Bundle level.
Bundle
|
Field |
Purpose |
| SKU | A unique identifier for the Bundle |
| Retail (inc VAT) |
A surcharge added to the total price of the Bundle Contents
Defaults to 0 |
| Retail Offer (inc VAT) |
A surcharge added to the total price of the Bundle Contents (this will supersede the Retail field), if enabled by the Offer Start/Expiry
Defaults to 0 |
| Trade (ex VAT) |
A surcharge added to the total price of the Bundle Contents for Trade Customers
Defaults to 0 |
| Trade Offer (ex VAT) |
A surcharge added to the total price of the Bundle Contents (this will supersede the Retail field), if enabled by the Offer Start/Expiry for Trade Customers
Defaults to 0 |
| RRP | An absolute value for the RRP, to show on the website |
| Postage Surcharge | An additional cost which will be applied at delivery for all orders which include this product |
| Free Shipping |
Determines whether this product receives free shipping
This will only apply to orders within which all items have this enabled |
| Width (cm) | Dimension of the product |
| Depth (cm) | Dimension of the product |
| Length (cm) | Dimension of the product |
| Height (cm) | Dimension of the product |
| Volume (m3) | Dimension of the product |
| Weight (Kg) | Dimension of the product |
| Offer Start |
Date from which the Retail/Trade Offer price should apply
If left blank, the Retail/Trade Offer price will apply unless an expiry date has been set in the past |
| Offer Expiry |
Date until which the Retail/Trade Offer price should apply
If left blank, the Retail/Trade Offer price will apply unless an start date has been set in the future |
Bundle Contents
Within this section, it is possible to select the Bundle Contents
| Field | Purpose |
| Group name |
The name of the Group, e.g. 'Chairs' or 'Table', or 'Apples' and 'Oranges'
Bundle Components within the same group will be presented to the customer as options, e.g. to choose between three different tables |
| Mandatory |
Whether this is a mandatory part of the Bundle
If set to 'no', the customer will be able to select 'Not Required' when making their purchase |
| Qty Included |
How many of this SKU should be included within the Bundle
It is possible to enter the same SKU more than once, with different quantities |
| Retail |
Retail price of the Bundle Component
|
| Trade |
Trade price of the Bundle Component
|
How Bundles display
Website
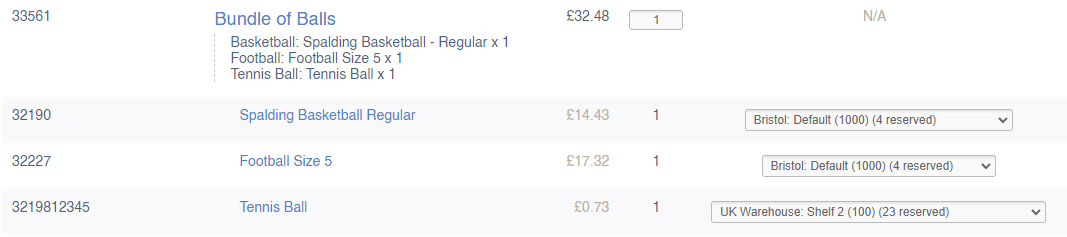
On the website, a Bundle will display as a single product, with the Bundle Contents clearly output.
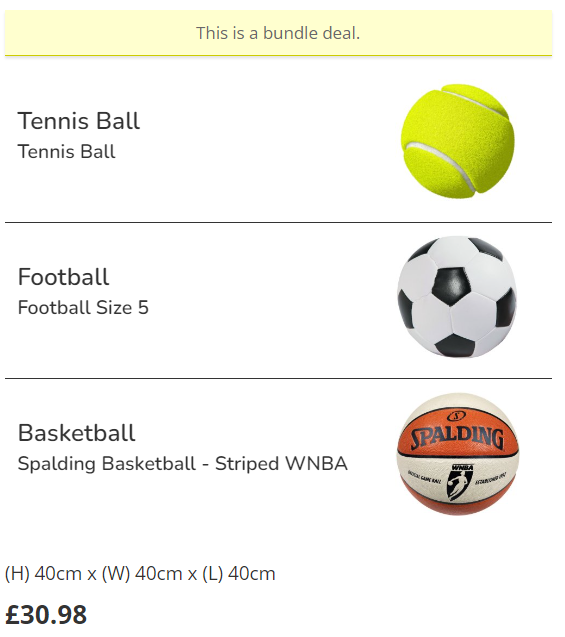
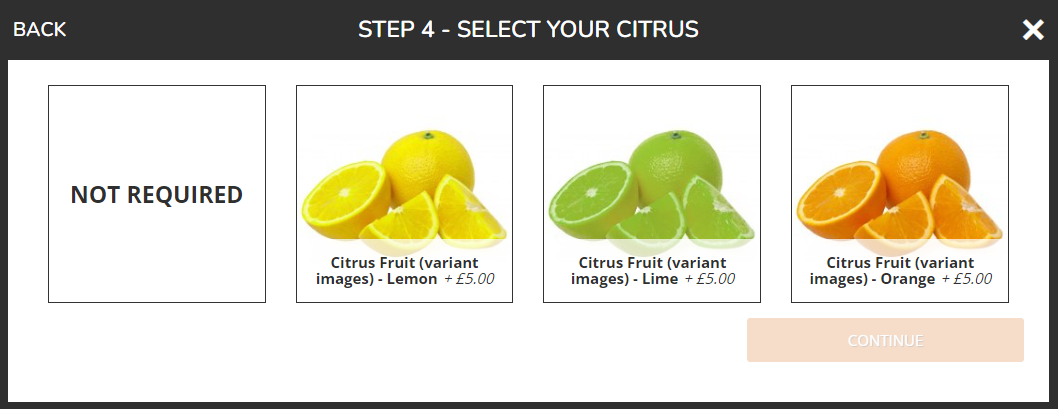
If a Bundle has options, these will be selected within in a similar manner to the Swatch Wizard.
CMS
When processing orders, Bundles are split out so that the Bundle Contents may be allocated an shipped individually.
FAQs
How do Bundles handle stock?
Stock for Bundles is based on the availability of the Bundle Contents; the smallest amount of free stock available to any of its Bundle Contents.
For example, if a Bundle had 3 Bundle Contents, of which one item had only 1 unit of free stock, while the others had 5 and 10 respectively, then the Bundles availability would be 1.
If the Bundle Contents are available for backorder, then the Bundle will be available even if there is no stock, although this will add a lead time.
Booking

This tab is used to manage the Booking product type.
To manage Bookings, this product must be set as a 'Booking' on the Product tab
Setup
A booking product may be setup with multiple Variants, in which case you will need to add Variant Options.
| Field | Purpose |
| Days ahead visible | This sets how far in advance a customer may make a Booking |
| Max per basket |
The maximum number of this Variant permitted in a basket
Leave this to 0 for no limit
Defaults to 0 |
| Customer note name |
Use this to add a requirement for a customer note; the text entered here will act as a customer prompt
If left blank, the customer will not be asked to leave a note |
| Capacity |
This is set against each individual timeslot |
Time Slots
Use these controls to set repeating time slots which are available to be booked.
It is also possible to insert specific date/time slots, which will act in addition to the default timeslots.
Inventory Tab
Please be aware that there will be additional fields on the Inventory tab if you are editing a Booking product. These will have to be managed appropriately.
Inventory

This tab is used to manage Variants and Unique Stock Records. This contains all of the essential areas to manage Variant specific information, as well as pricing and stock.
Many of these fields are optional, and will either be left blank or set to a default during product setup. Mandatory fields and default values are marked with a *.
This section allows products to be edited individually; editing in bulk is done with other tools, such as the CSV Upload or the Bulk Updater
It is also possible to delete Variants from this screen. When deleting a Variant, this action will also delete all associated stock.
Please note that while it is possible to change a SKU code from this screen, we strongly recommend against doing so. The SKU code is the unique identifier for your product. If this is changed, it may have wide ranging impacts on everything from Sales Orders through to Purchase Orders and Reporting.
At the bottom of the screen, there is a button to 'auto generate variant' button - this will generate Variants for every possible combination of Option. E.g. where options exist for sizes 'small', 'medium', large', and colours 'green' 'red' and 'blue', nine variants would be created. This is only possible if no Customisations have been attached to the Product.
Setup
Variant
| Field | Purpose |
| SKU* |
A unique identifier for the Variant
If left blank, this will be auto populated
Max length: 80 characters |
| Barcode |
A unique barcode for the Variant
If left blank, this will be auto populated |
| Barcode Alias |
Accessible by pressing the + button to the right of the Barcode field
Enter multiple barcode aliases in the pop up
These barcodes can be scanned as required throughout the system |
| MPN | Manufacturer's Part umber - this is used in Purchase Orders when ordering stock from a Supplier |
| Option (1, 2, 3)* |
You may set up to three Variant Options; the can be free typed, or will be a drop down menu if you have populated the Options tab
These are required if your product has multiple Variants
If a Product has multiple Variants, but the Option fields are left blank, that Variant will not be displayed |
| Quantity | This will show the current stock level of the Variant (see Stock Management below) |
| Variant Live |
Sets whether this Variant is live
It is possible to have a Product with multiple Variants where some are not live
If all Variants are set 'Variant Live' to No, then the Product will be disabled.
Defaults to Yes |
| Allow Backorder | This sets whether the Product may be sold without stock, e.g. Sales Orders will be fulfilled by a back to back Purchase Order |
| Allow pre-order | This will determine whether stock 'on the water', e.g. on a submitted Purchase Order that has not yet been received, will be displayed as available stock on your website |
| Tier & Tiered Pricing |
Use this to set up tiered pricing; these permit quantity based price breaks for the Retail and Trade prices
Enter the quantity in the Tier field, and the appropriate prices
These work on an 'equal to or greater' basis, so if the Tier is set to 5, the price will apply if the customer purchases 5 or more of the item
It is possible to stack multiple Tiers |
| Retail (inc VAT) |
The selling price of the Variant
Defaults to 0 |
| Trade (ex VAT) |
The trade price of the Variant
Defaults to 0 |
| Price List Pricing |
Use this to set up pricing for this Variant via Price Lists:
Then enter a price for all applicable Price Lists
It is also possible to do this in bulk via the Price List controls |
| Cost Price (ex VAT) |
The cost price of the Variant
Defaults to 0
May be set per Supplier enabled for this Product
From this screen, it is also possible to manually amend the Cost Price of individual Stock Records linked to this Variant |
| RRP |
The RRP of the Variant, to show on the website
Defaults to 0 |
| VAT |
Select the VAT status of this Variant - choose from:
VAT rates for Standard and Reduced are controlled via Countries |
| Retail Offer (inc VAT) |
A retail offer price for the Variant (this will supersede the Retail field), if enabled by the Offer Start/Expiry
Defaults to 0 |
| Trade Offer (ex VAT) |
A trade offer price for the Variant (this will supersede the Trade field), if enabled by the Offer Start/Expiry
Defaults to 0 |
| Offer Start |
Date from which the Retail/Trade Offer price should apply
If left blank, the Retail/Trade Offer price will apply unless an expiry date has been set in the past |
| Offer Expiry |
Date until which the Retail/Trade Offer price should apply
If left blank, the Retail/Trade Offer price will apply unless an start date has been set in the future |
| Postage Surcharge | An additional cost which will be applied at delivery for all orders which include this Variant |
| Free Shipping |
Determines whether this Variant receives free shipping
This will only apply to orders within which all items have this enabled |
| Number of Cartons |
The number of Cartons in which this Variant is delivered from your Supplier
This will determine the number of product labels which will be printed from the Label Printing screen, or at Goods In |
| Width (cm) | Dimension of the Variant |
| Depth (cm) | Dimension of the Variant |
| Length (cm) | Dimension of the Variant |
| Height (cm) | Dimension of the Variant |
| Volume (m3) | Dimension of the Variant |
| Weight (Kg) | Dimension of the Variant |
| Variant image |
Use this to select a Variant specific image; this will be drop down list of images uploaded to this Product
This may also be set via the Images CSV import |
| Low Stock (order at) |
Use this to set a low stock threshold
If the stock level is below this level, a warning will be show on your website and the Variant will appear within the Low Stock report
This will also be used to drive Replenishment |
| Low Stock (order to) |
Use this to set a minimum stock level
This will be used to drive Replenishment |
| Lead time (days) | Set the leadtime (total days) for the Variant |
| Stock Text | A label that will display on the Product Detail Page if this Variant has been selected |

Unique Stock Records
Unique Stock Records can be created and managed from the Inventory tab. These will be displayed in a fold out section, below the main Variant to which they are linked.
The Customisations which define the Unique Stock Record will be displayed in this section; these are only shown within the CMS and POS.
You can click here for information on how to create a Unique Stock Record
| Field | Purpose |
| Live (WEB) |
If set to yes, this USR will be available for sale on the eCommerce PDP via a specific shortcut
This will also enable the USR for sale within the CMS |
| Live (POS) |
If set to yes, this USR will be available for sale in the POS
This will also enable the USR for sale within the CMS |
| Label | A customer facing label for this Unique Stock Record |
| Barcode |
A unique barcode for the Unique Stock Record
If left blank, this will be auto populated |
| Retail (inc VAT) |
The selling price of the Unique Stock Record
Defaults to that set against the parent Variant |
| Retail Offer (inc VAT) |
The trade price of the Unique Stock Record
Defaults to that set against the parent Variant |
| Trade (ex VAT) |
The trade price of the Unique Stock Record
Defaults to that set against the parent Variant |
| Trade Offer (ex VAT) |
The trade offer price of the Unique Stock Record
Defaults to that set against the parent Variant |
| Cost Price (ex VAT) |
The cost price of the Unique Stock Record
Defaults to that set against the parent Variant, and will be updated whenever this Unique Stock Record is ordered from a Supplier on a Purchase Order (this will not affect the cost price stored against units of stock) |
| RRP |
The RRP of the Unique Stock Record, to show on the website
Defaults to that set against the parent Variant |
| Quantity | This will show the current stock level of the Unique Stock Record (see Stock Management below) |
| Variant Image | Use this to select a Unique Stock Record specific image; this will be drop down list of images uploaded to this Product |
Stock Management
It is possible to manually view adjust the stock of a Variant from the Inventory tab.
This is done by clicking on the 'Quantity' box, which will open a pop up.
Within the pop up, adjust the stock levels in the Locations that need changing.
When amending stock levels manually from the Inventory tab, it is essential to enter a 'Reason for change', which will be recorded in the Stock History Report
If the Quantity button is followed by a '+ X', that indicates that there is stock of linked Unique Stock Records, e.g. 
Bookings
If a product is set to the 'Booking' product type on the Product tab, there will be some additional fields on the Inventory tab.
For more information see the Booking section.
| Field | Purpose |
| Time Slots to Book |
This allows a customer to book multiple slots simultaneously, e.g. set this to 2 to sell a pair of tickets
Defaults to 1 |
| Time Slot Spans to Book |
This controls the duration of the booking
Defaults to 1 |
FAQs
Can I view Stock History for a Variant?
Yes, there is a link from the Inventory tab to the Stock History report.
Can I view Price History for a Variant?
Yes, there is a link from the Inventory tab to the Price History report.
Can I set up different price points for different customers?
Yes, this is done on the Inventory tab of the Product, or within the Price Lists section of the CMS.
Can I view Stock on Order for a Variant?
This can be viewed on the Inventory tab - if stock is on order for a Variant, a 'quantity on order' will be shown, along with a link that will open a pop up. That pop up will contain the details of the quantities ordered and the Purchase Orders on which the Variant has been ordered.
Can I view Reserved Stock for a Variant?
This can be viewed on the Inventory tab - if stock is reserved for a Variant, a 'quantity reserved' will be shown, along with a link that will open a pop up. That pop up will contain the details of the reservations.
How should I mark stock as damaged?
You can do this by moving Units into a 'Damaged' Location in a Store.
Alternatively, you can create a Unique Stock Record from existing stock.
Can a USR be set to web/eCommerce only?
Yes, just use the 'Live (WEB)' field.
Can a USR be set to POS only?
Yes, just use the 'Live (POS)' field.
Can I make a stock adjustment for a specific Variant or USR?
Yes - you can amend the quantity against the Variant or USR, and this will show as a Stock Discrepancy. You must enter a reason.
The system will then attempt Stock Matching to clean up the discrepancy.

This tab can be used to manage information sent to Google.
For this tab to be visible, this Product must be linked to a Category that has been mapped to the Google category hierarchy
See Integrations for more information.
Setup
Various bits of information about your product will be automated for the feed. These will include elements such as images and title.
Some of this information is mandatory, and some will be optional; these requirements will vary based on the product category. You will need to refer to Google's documentation for further detail.
| Field | Purpose |
| Brand |
Use this to determine the Brand sent in the feed
Defaults to the Brand set in the CMS |
| Product Type |
Use this to override the Google Category assigned to this product
May be left blank
By default, this will inherit the setting in the Product's parent Category (the Category that this is taken from will be clearly listed here as 'default') |
| Google Promotion ID | Add a Google Promotion ID here |
| Barcode | By default, this will use the barcode set against the Variant |
| MPN | By default, this will use the MPN set against the Variant |
| Gender | Use this to set the Gender for the Variant |
| Age Group | Use this to set the Age Group for the Variant |
| Colour | Use this to set the Colour for the Variant |
| Size | Use this to set the Size for the Variant |
| Custom | Use this to set additional information for the Variant |
This tab will only show Variants - Unique Stock Records will not be sent to Google.
eBay

This tab can be used to manage information sent to eBay; this will enable you to create and manage listings.
From this screen, you can create, update and end listings.
For this tab to be visible, this Product must be linked to a Category that has been mapped to the eBay category hierarchy
eBay Integration
This will require setup beyond this tab. Elements of the integration are managed within the Site Settings, and you will need to speak to Iconography to enable this function.
Your eBay integration must be authorised - this can be done via Integrations.
Products may be listed with their Variants, but Unique Stock Records can not be listed on eBay.
Setup
Various bits of information about your product will be automated for the feed. These will include elements such as images and title.
Some of this information is mandatory, and some will be optional; these requirements will vary based on the product category. You will need to refer to eBay's documentation for further detail.
Inventory
| Field | Purpose |
| Status |
Shows the status of this product, e.g. 'listed' or 'not listed' |
| Listing ID |
This will provide a link to the eBay listing (if applicable) |
| Auto Price |
Use this to determine whether the price of the eBay listing will be automatically updated to match price changes in IXO Commerce |
Custom Name & Description
| Field | Purpose |
| eBay Name |
Use this to override the product name
If left blank, the standard product name will be used |
| eBay Description |
Use this to override the product description
If left blank, the standard product description will be used |
Category Override
| Field | Purpose |
| Category Override (search) | Use this field to search for a different category |
| Category Override (drop down) | Use this drop down to select your override category |
If left blank, this will inherit the setting in the Product's parent Category (the Category that this is taken from will be clearly listed here as 'default')
Item Aspects
Use these fields to add item specifics.
Some of this information is mandatory, and some will be optional; these requirements will vary based on the product category. You will need to refer to eBay's documentation for further detail.
eBay Policies
Whenever you create a listing you'll need to choose a set of business policies – these are the payment, postage, and return details you specify for buyers. You can make the listing creation process, and the management of any existing listings, more efficient by creating policy templates that store your preferences for each of these areas.
If a policy is not selected, the first available policy will be used.
| Field | Purpose |
| Fulfilment Policy | Choose your Fulfilment Policy |
| Payment Policy | Choose your Payment Policy |
| Return Policy | Choose your Return Policy |
FAQs
This section is used to add FAQs to a Product. These will be output as a tab on the Product page.

FAQs can also be added to multiple Products simultaneously using the FAQs section
Workflows - Products
Adding a New Unique Stock Record
A Unique Stock Record is a version of a Variant to which Customisations have been applied.
There are several ways in which a new Unique Stock Record will be created.
A Unique Stock Record is also called a USR
Automatically when an item is ordered from a Supplier
Whenever a Made to Order item is ordered from a Supplier via a Purchase Order, a Unique Stock Record will be created; this occurs when the Purchase Order is submitted.
This is done so that the stock is tracked correctly.
It also means that if the same combination of Customisations are selected on a Sales Order, that Sales Order Line may be allocated to that Purchase Order Line.
Manually via the Inventory Tab
This may also be made manually via the Inventory tab.
On Made to Order Products, this may be done via the Inventory Tab.
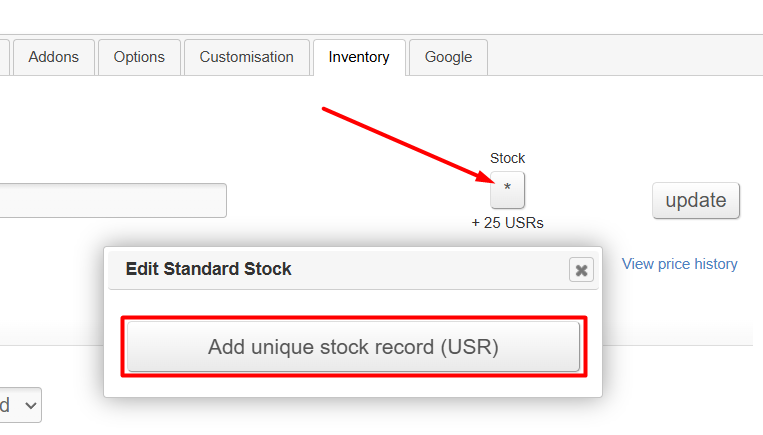
Made to Order Products
For these, you can simply click on the stock button and press 'Add unique stock record (USR)'.
Standard Products
For Standard Products, you will need to go to the bottom of the Variant in the Inventory tab. Then simply press the 'add new' button.

Build a New Unique Stock Record
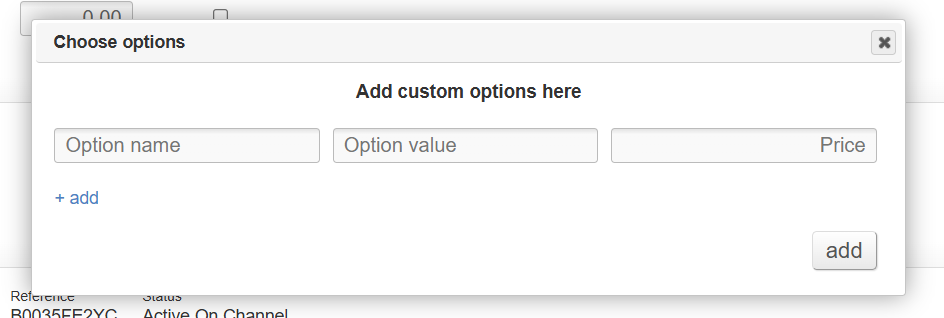
When adding a brand new Unique Stock Record, you will be prompted to select options.
If the Product is set up with Customisations, then you will choose from those available.
If the Product does not have Customisations, then you will be able to manually enter differences.
A USR added in this way will have zero units of stock, and will be disabled. You can then enable it for sale or add it to a Purchase Order as necessary.
Convert Existing Stock
This is best used when marking units of stock as damaged, e.g.

This can then be sold as a separate reduced price item, or left for reference purposes.
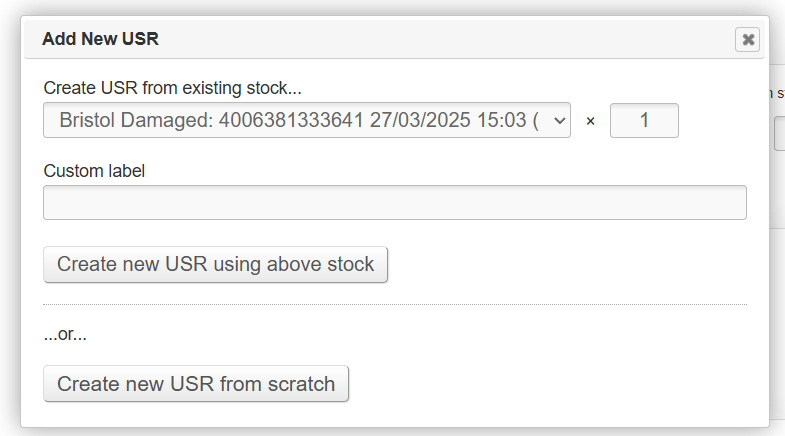
How to convert existing stock
When creating a new Unique Stock Record, if the parent Variant has stock, you will be given the option to Create a Unique Stock Record from existing stock.
You will use the same method to select Customisations.
If you do this, it will create a Unique Stock Record, and will give it a stock level equal to that which you select in the top two fields. The stock of the parent Variant will be reduced by a corresponding figure. Essential information about the Stock Record, e.g. Purchase Order, Cost Price, age, etc., will be preserved as the stock is moved to the USR.
Definitions
Variants
A Variant is a version of a Product, which can be managed from the Inventory tab. These will be separated by Variant Options, and those distinctions are made in pricing or stock, e.g.
- Size
- Colour
- Fabric Grade
A Variant may be linked to multiple Unique Stock Records.
Each Variant on a product may be given:
- Specific pricing
- Specific stock
- Specific dimensions
- Specific product imagery
- Specific Customisations
- Specific Upsells
- Specific Addons
Other features around the site also link to Variants, including Promotions, Reporting, Order Fulfilment, etc.
Unique Stock Records
A Unique Stock Record is a sub Variant; it is a Variant to which Customisations have been applied.
A Unique Stock Record is also known as a USR
It will inherit all characteristics of the parent Variant, except that it will also show the linked Customisations.
These may be used just for Stock Management and order fulfilment, or as a way of listing specific products for sale.
These are managed via the Inventory tab, and may either be created there, or when a product with Customisations is added to a Purchase Order.
Unless a Unique Stock Record is marked as enabled, its selling price will not be used in the POS, eCommerce or CMS. Instead, the default price of the Variant will be used
Unless a Unique Stock Record is marked as enabled, its cost price will not be used in the POS, eCommerce or CMS. Instead, the default price of the Variant will be used.
FAQs
How can I add a new Unique Stock Record?
A full guide is available here.
My Unique Stock Record is marked as disabled for eCommerce - will its stock be used?
While free stock of an enabled USR will show to the customer as 'in stock', free stock relating to a disabled USR will not, and the customer will see a default lead time for the parent Variant. However, if a customer does purchase a Variant and select a combination of Customisations which match an existing USR with free stock, then that stock will be automatically allocated to that Sales Order Line regardless of USR status.