Product Overlays
Manage your Product Overlays and automate assignment.
- Summary
- Overlay Rules
- How to Add an Image Based Overlay
- How to Add a Text Overlay
- How to Assign Overlays to Products in Bulk
- FAQs
Summary
This tool allows you to manage and update Product Overlays. These can be assigned individually through the Edit Product screen, or in bulk via the Overlay Rules on this page.
Key to icons
![]() = edit
= edit
![]() = delete
= delete
![]() = Overlay Rules enabled
= Overlay Rules enabled
Setup
Overlays may be set up either as Images, or as a Text Overlay.
Image Overlay
To setup an Image Overlay, simply select 'Image' when defining Overlay Type.
You will need to upload an image. By default, these are set to be 100px square, and we strongly recommend the use of PNGs with transparent backgrounds.
Text Overlay
These allow overlays to be set up without having to be able to use image editing software.
To setup a Text Overlay, simply select 'Text' when defining Overlay Type.
Use the dialogues to enter your desired text, as well as to choose a text and background colour.
Colour contrast will automatically be reviewed; this is done to ensure good Accessibility to your website.
How Overlays Display
Product Landing Pages
Overlays are shown on Category, Brand, Collection and Search Result pages. These Overlays will also be displayed within Modular Block content, as well as at the Checkout.
There are five possible Overlay locations:
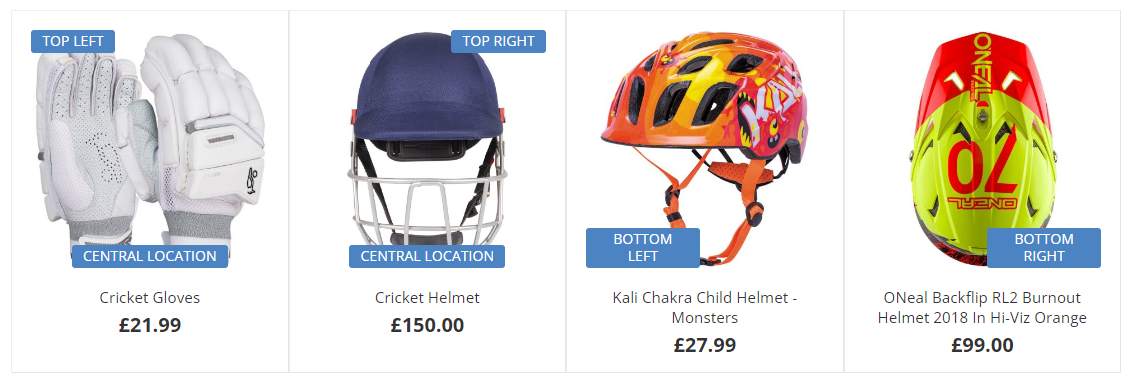
Product Detail Pages
Overlays will show in the same locations as on the Product Landing Pages, above.
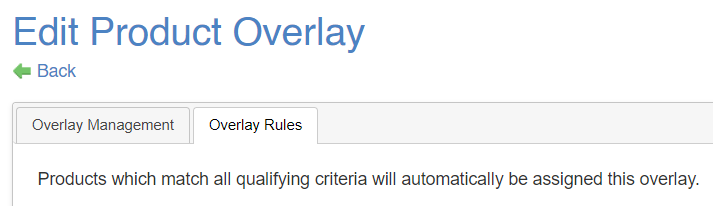
Overlay Rules
Each Product may be manually assigned a single Overlay. However, the process of adding and removing overlays can be simplified through the use of Overlay Rules.
How Overlay Rules Work
The user sets up several rules, by which the website can check whether any product qualifies for an Overlay.
Through this method, when products become eligible, that Overlay will immediately display.
When a product ceases to be eligible, that Overlay will immediately be removed.
A common Overlay is 'Sale'. If a Product has a Sale Price that becomes active, that overlay will automatically be displayed. When that Sale Price is disabled, the Overlay will automatically be hidden.
Setting Up New Overlay Rules
Overlay Rules are managed in the second tab of the Edit Product Overlay screen.
Simply select the criteria that you wish to apply to your Overlay Rule.
Overlay Rules work on an AND basis. That means that in order for a rule to be applied, all criteria must be met.
E.g. an Overlay may be set to show on Products which 'Have an active sale price' AND 'were added in the last 30 days' AND 'are in the Beds category'.
Once added, this will be automatically active, and live Products will display the Overlay if it applies to them.
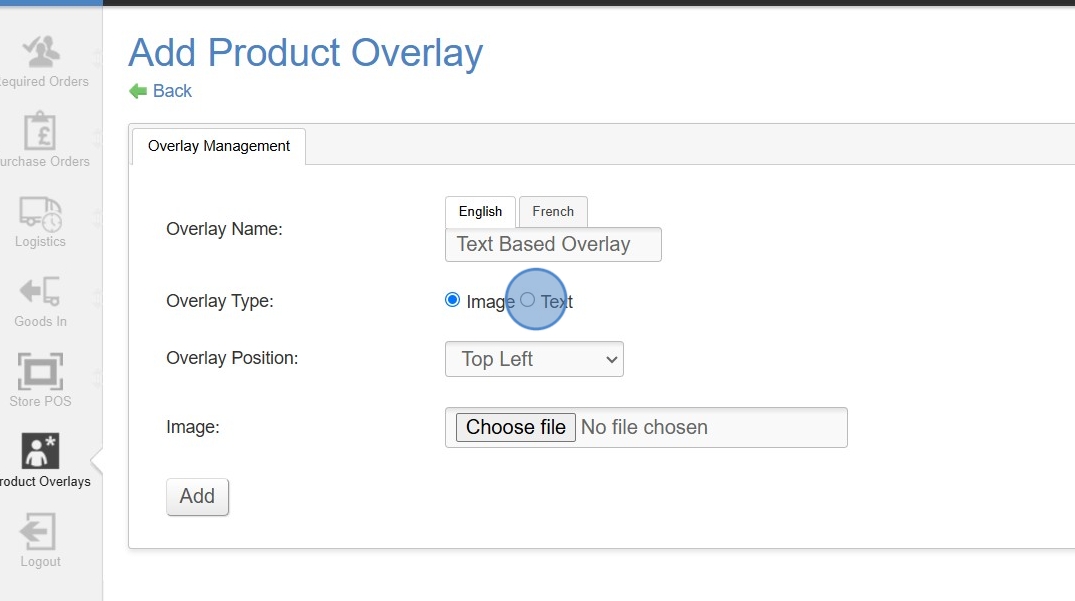
How to Add an Image Based Overlay
You can use your own graphics as overlays on products by following the simple steps below.
1. Navigate to your CMS.
2. Click "Product Overlays" under Catalogue.

3. Click "add an overlay".

4. Give your Overlay a name and ensure the "Image" toggle is selected.

5. Choose your desired Overlay Position from Top Left, Top Right, Bottom Left, Bottom Right and Below Product. Note that products can display one overlay per position.

6. Choose the appropriate image file you wish to use as the Overlay.

7. Click "Add" to complete the process of adding an image based Overlay.

How to Add a Text Overlay
If you wish to add an overlay and do not have any graphics to use, you can simply add a text Overlay by following these simple steps.
1. Navigate to your CMS.
2. Click "Product Overlays" under Catalogue.

3. Click "add an overlay".

4. Give your Overlay a name.

5. Ensure the "Text" toggle has been selected.
6. Choose your desired Overlay Position from Top Left, Top Right, Bottom Left, Bottom Right and Below Product. Note that products can display one overlay per position.
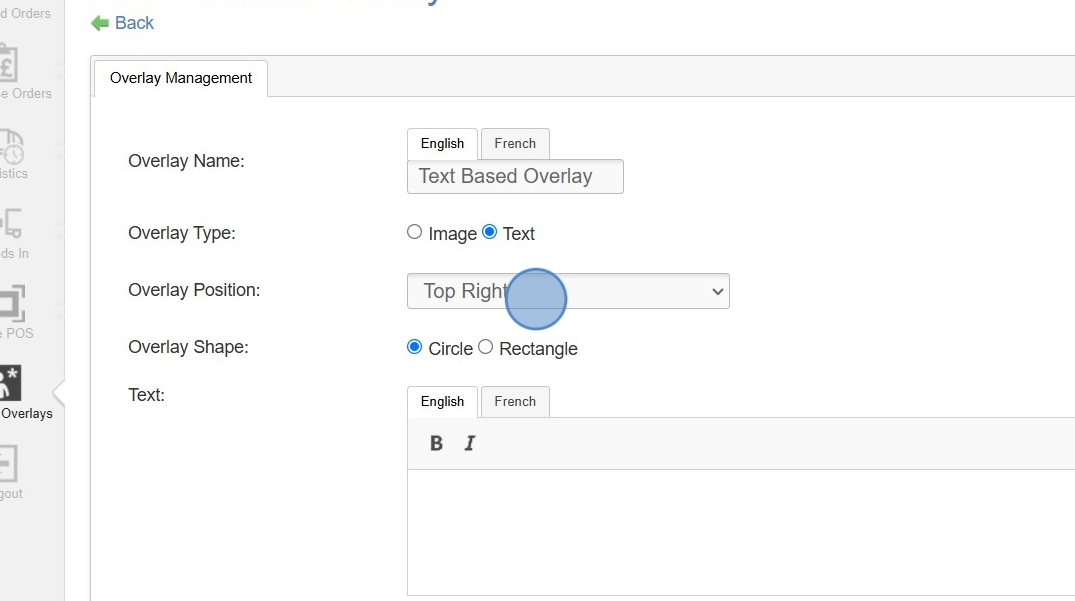
7. Choose your preferred Overlay shape from Circle or Rectangle.
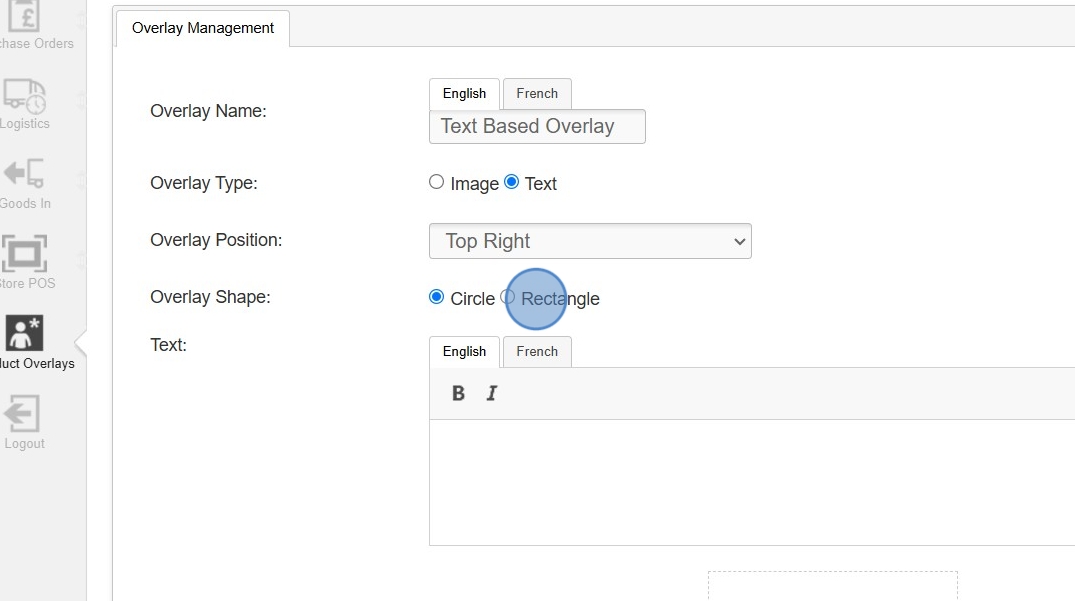
8. Type in the text that you wish to use on your Overlay. In this instance we have used "BLACK FRIDAY SALE".
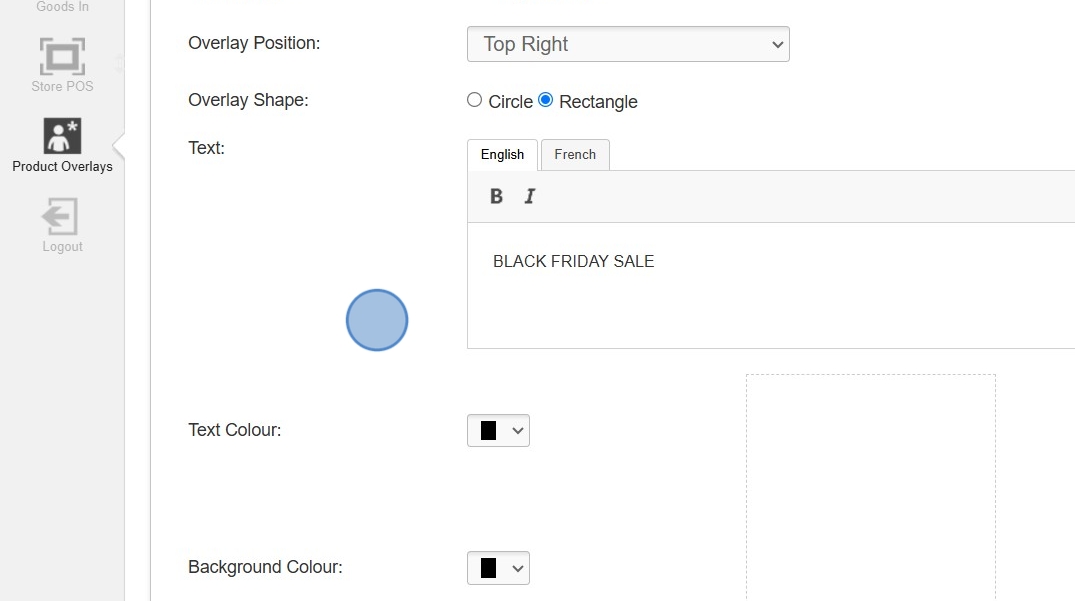
9. Choose your desired text colour.
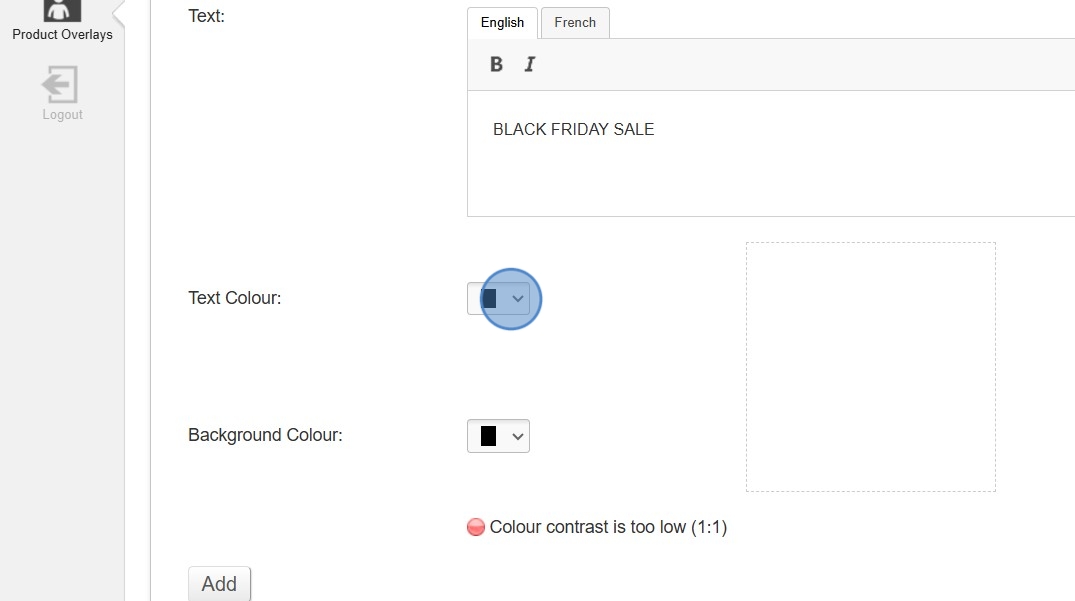
10. Choose your desired background colour.

11. Once you are happy, click "Add" to complete the set up of a the text overlay. Once you have done this, a preview of the Overlay will be shown.

How to Assign Overlays to Products in Bulk
Overlays can be assigned in bulk to products using the Overlay Rules tab as follows:
Products can have one Overlay assigned per position (Top Left, Top Right, Bottom Left, Bottom Right, Below Product). When assigning an Overlay, keep in mind that it may not show on products where an Overlay is already assigned to the same position.
1. Navigate to your CMS.
2. Click "Product Overlays" under Catalogue.

3. Add a new Overlay, or click the edit icon to go in to an existing one. In this case we are choosing "Black Friday Sale".
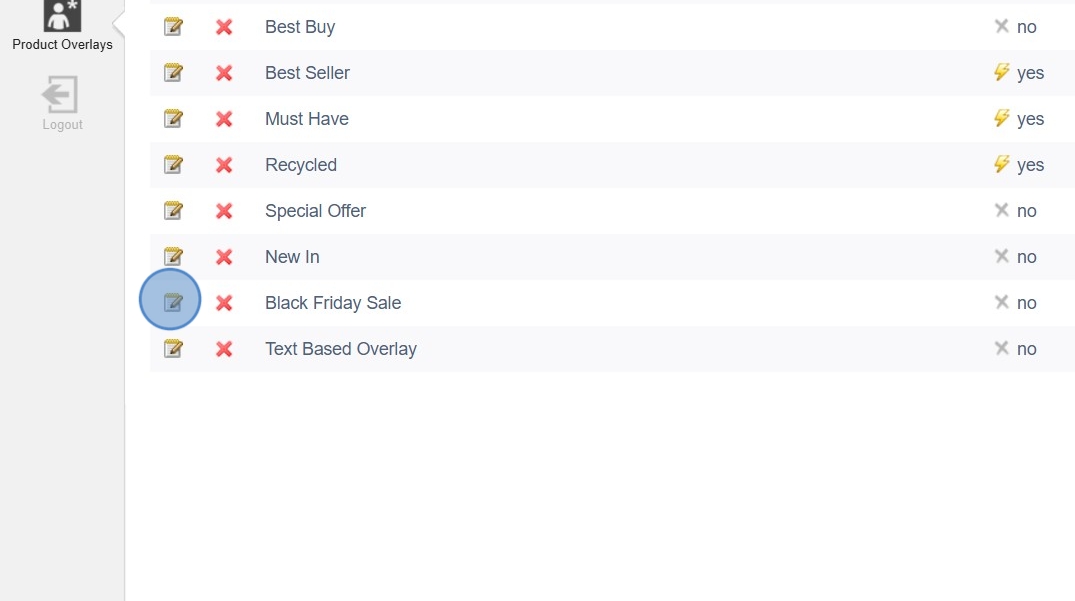
4. Once an Overlay has been added, the "Overlay Rules" tab will become visible. Click the tab to open the rules.

5. You can select multiple criteria to ensure that the Overlay is assigned to the appropriate products. In this instance we are choosing to the display the Overlay against all products that are currently "In stock". This is dynamic, so if stock arrives for a product that previously had no stock, the Overlay will then be applied.

Category Feature Product - any product marked as a feature product from within the product screen.
Home Page Product - any product marked to show on the home page.
In stock - any product that currently has stock allocated to it.
Best sellers above X sales rank - any product that is performing above a set rank in terms of sales.
Has an active sale price over X% - any product that has a sales price greater than the chosen percentage.
Added within X days - any product that has been added to the CMS within the set number of days.
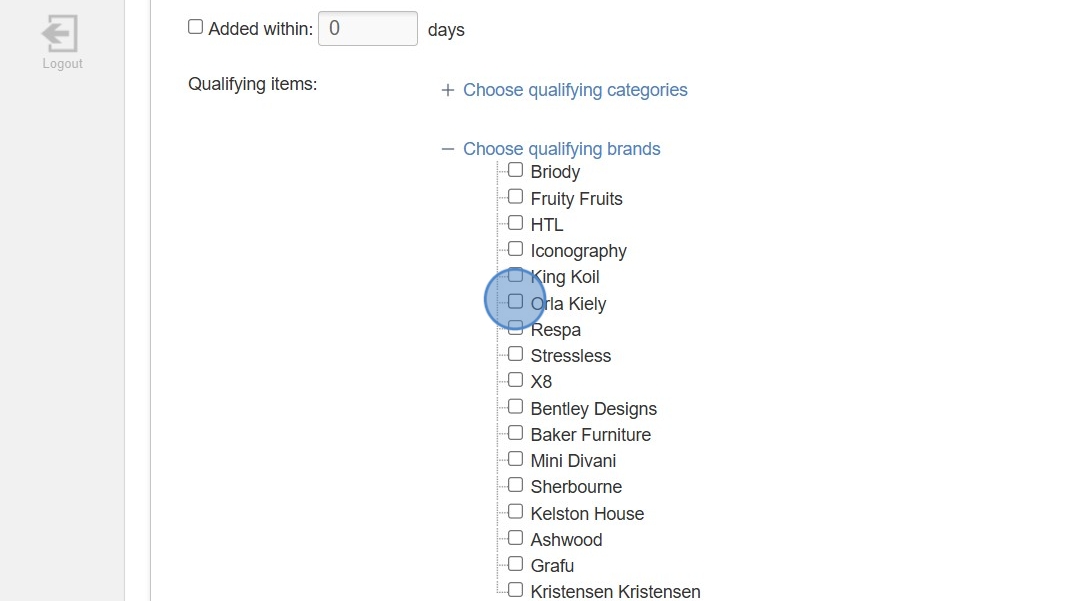
6. You may wish to assign the Overlay to specific categories, brands and/or collections. You can also assign to specific attributes that are assigned to products (colour, size etc).
Please note that where parent folders exist, ticking to assign an overlay to the parent folder will assign it to everything included in all child folders also. You may wish to assign at a more granular level by assigning to child categories.
7. Once you are happy with how your Overlay will be assigned, click "Update" to complete the setup.

FAQs
Why isn't my overlay isn't showing?
There are lots of possible answers to this question. Ensure that you have checked:
- if multiple active overlays are in the same location
- if your overlay rules apply to the product in question
- if your overlay has a start or end date that is hiding it