Import Export
Bulk import and export via CSVs.
Summary
This section is used to manage products in bulk. It can be used to export and import Product information via CSVs.
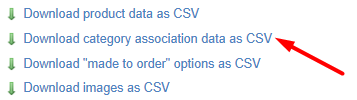
There are five files, each of which may be exported and imported.
It is possible to use this feature to edit existing products and create new products
File Types
There are five file types:
There are additional exports and imports, including ones for Price Management, Purchase Orders and via the Bulk Update and Product Lookup tools; all of these files may be imported here
Field Mapping
When importing a file, you will need to ensure that the columns in your spreadsheet are mapped to IXO Commerce database fields. Your column headers will be shown on the left hand side of a table; choose from the drop down to match to a field.
Mistakes made here may have serious impact on your Product database.
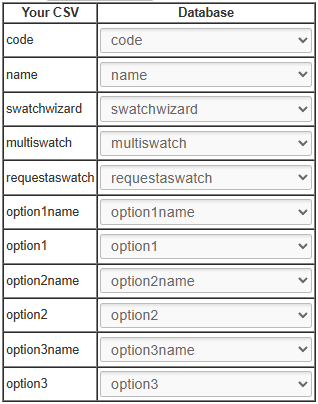
IXO Commerce will attempt to match fields to columns based where possible.
When managing Product (Variant) imports, it is also possible to create pre-sets
FAQs
When will a new Product be created?
If you are uploading a Product (Variant) import, the system will perform a lookup for the SKU codes in your spreadsheet. If the SKU code exists, that Variant will be updated to match the data in your spreadsheet. If it does not exist, a new one will be created.
File Types
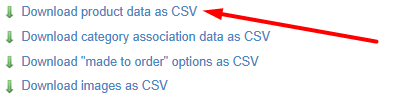
Product Data
This may be used as an Import or an Export.
Export
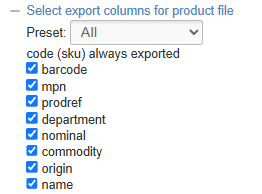
Use these filters to limit which columns are exported.
Use the filters to narrow your selection, then click 'Export'. This will generate a file that will include all Products that match your filters.
The export will include one row for each Variant linked to those Products.
Presets
It is possible to build Export presets. These provide a shortcut to which columns will be output.
You can either choose an existing preset from the drop down, or select 'new preset' If you do so, you will be prompted to enter a preset name, and select the required fields. That preset will then be available for future exports.
The SKU Code is always exported as the first column.
Import
Make changes to the file and import it to update Products.
When imported, the file will perform these two functions for each row:
- If the SKU Code already exists in the database, then it will be updated as per the data in the spreadsheet
- If the SKU Code does not exist, then a new Product will be created (see below for more details)
It is not possible to remove data using this method; blank cells will be ignored
Merging Products
When creating a new Product, it is possible tomerge multiple rows into a Product with multiple Variants.
To do so, each row must share the same Name and ProdRef.
New Products with the same Name and ProdRef will be automatically merged on creation.
Field Summary
| Field | Purpose |
| code |
Sku Code (alphanumeric, mandatory, max 80 characters)
This field will not accept special characters; please limit your entries to letters, numbers, '-' and '.' |
| barcode |
Barcode field (alphanumeric)
This will be autogenerated if left blank |
| mpn |
Manufacturer's Part Number (alphanumeric, stored per Variant) |
| prodref |
Product Reference
This is used to link Products as separate Products, or to merge new Variants into a new Product (see above) |
| department | This powers the Sales by Department report (alphanumeric) |
| nominal | This field typically forms part of an integration with an accounts package |
| commodity | Enter the Commodity Code of the product (for use with exports) |
| origin |
Enter the Country of Origin (enter the country code, e.g. GB)
This is only required when exporting |
| name |
The Name of the Product (mandatory)
Displays as the page title (also known as the H1 Text) and is also output on Product Listing Pages, as well as being the primary field for search results
Also used as the Meta-Title by default
This may be used to merge new Variants into a new Product (see above) |
| manufacturersproductname | If populated, this will replace the Product Name on all Purchase Orders |
| price |
The selling price of the Variant
Defaults to 0 |
| rrp |
The RRP of the Variant, to show on the website
Defaults to 0 |
| offerprice |
A retail offer price for the Variant (this will supersede the Retail field), if enabled by the Offer Start/Expiry
Defaults to 0 |
| offerstart |
Date until which the Retail/Trade Offer price should apply
If left blank, the Retail/Trade Offer price will apply unless an start date has been set in the future |
| offerexpiry |
Date from which the Retail/Trade Offer price should apply
If left blank, the Retail/Trade Offer price will apply unless an expiry date has been set in the past |
| costprice |
The cost price of the Variant
Defaults to 0
May be set per Supplier enabled for this Product
This may only be used if the Product is linked to a single Supplier. If there are multiple Suppliers, you will need to use the Cost Price import. |
| vat |
Select the VAT status of this Variant - choose from:
VAT rates for Standard and Reduced are controlled via Countries |
| lowstock |
Use this to set a low stock threshold, e.g. '7'
If the stock level is below this level, a warning will be show on your website and the Variant will appear within the Low Stock report
This will also be used to drive Replenishment |
| highstock |
Use this to set a minimum stock level, e.g. '5'
This will be used to drive Replenishment |
| stocktext | A label that will display on the Product Detail Page if this Variant has been selected |
| allowbackorder | This sets whether the Product may be sold without stock, e.g. Sales Orders will be fulfilled by a back to back Purchase Order (yes/no) |
| allowpreorder | This will determine whether stock 'on the water', e.g. on a submitted Purchase Order that has not yet been received, will be displayed as available stock on your website (yes/no) |
| postagetypes |
Enter postage type 'codes' in a comma delimtied list, e.g. 'standard,collect'.
Default postage types will be applied automatically to new Products |
| deliverytext |
Text entered in this field will display to the customer on the website if the product has available free stock
If left blank, this will default to 'In Stock' |
| deliverytext2 |
Text entered in this field will display to the customer on the website if the product does not have available free stock
If left blank, this will default to 'Out of Stock', or, if enabled for allowbackorder on the Inventory tab, it will default to 'Available (allow XXXXXX days for delivery)' |
| leadtime | Set the leadtime (total days) for the Variant |
| brandname |
This adds a Brand to a product
This will text match to an existing entry; if a matching entry does not exist, it will be created |
| supplier |
This section is used to add Suppliers for a product. If not manually set, the default is to apply none.
If you are using multiple Suppliers for a single product, these may be added as a comma delimited list This will text match to an existing entry; if a matching entry does not exist, it will be created |
| collection |
This section is used to add Collections to a product. If not manually set, the default is to apply none.
This will text match to an existing entry; if a matching entry does not exist, it will be created |
| summary |
This field allows for a simple summary of the product, with simple formatting
This may be uploaded with HTML to apply basic formatting |
| description |
This field controls the Product Description; formatting may be added to this using the controls at the top of the screen
This may be uploaded with HTML to apply basic formatting |
| tab1 to tab 4 |
If populated, this will add a new product information tab onto the product page; this field will provide the title of that tab
This will display in the same manner as a Global Tab |
| tab1to tab 4 content | This will form the content of a custom tab; this is populated as per the Product Description |
| Merge Tag Title |
The title used on linked eCommerce Products
Used in Conjunction with Product Reference
Note that this field is optional for linked Products |
| Merge Tag |
The label used on linked eCommerce Products
If multiple Products have the same Product Reference, they will be linked to the eCommerce Customer if a Merge Tag Title and Merge Tag are entered
Used in Conjunction with Product Reference
Note that this field is mandatory for linked Products |
| pdftext | Text entered here will be the link text shown to the customer on your website
This will default to the file name, if left blank |
| videoid |
Use this to determine the type of video (Youtube/Vimeo) |
| videotype | Enter the ID of the video that you want to attached to the product
You can find the video ID from the URL:
https://www.youtube.com/watch?v=dQw4w9WgXcQ
|
| weight | Dimension of the Variant (kg) |
| volume | Dimension of the Variant (m3) |
| unitwidth | Dimension of the Variant (cm) |
| unitdepth | Dimension of the Variant (cm) |
| unitlength | Dimension of the Variant (cm) |
| unitheight | Dimension of the Variant (cm) |
| cartons |
The number of Cartons in which this Variant is delivered from your Supplier
This will determine the number of product labels which will be printed from the Label Printing screen, or at Goods In |
| productlive | Defines the Product Status (yes/no) |
| variantlive |
Sets whether this Variant is live
It is possible to have a Product with multiple Variants where some are not live
If all Variants are set 'Variant Live' to No, then the Product will be disabled.
Defaults to Yes |
| buyonline | Defines whether the Product can be bought online (yes/no) |
| visibility |
By default, all products will be visible on your website, but this setting allows you to determine visibility of the product within the POS, or across multiple websites
Enter a comma delimited list, e.g. website/instore |
| featuredhome | Toggle to feature the product on the Home Page |
| featured | Toggle to feature the product on Category Pages |
| freeshipping |
Determines whether this Variant receives free shipping
This will only apply to orders within which all items have this enabled
(yes/no) |
| disallowdiscounts | |
| swatchwizard | Toggle to enable the Swatch Wizard (yes/no) |
| multiswatch |
Toggle to combine variants within the Swatch Wizard (yes/no)
This controls the following field against the Product: 'Combine variant and swatch selection in Swatch Wizard if applicable (enables "multiswatch")'
This will not be available if multiple layers of Variant option are on a product, e.g. 'Size' and 'Colour'
This will not be available if any live Variant has no Customisations |
| previewswatch |
Enables swatch preview panel (yes/no)
Made to Order Products only |
| requestaswatch | Toggle to enable the Swatch Request Popup (yes/no)
(Swatches must be enabled for the Swatch Request tool for this to function) |
| itemcondition | Choose if a product is 'New' or 'Used' |
| meta_title | Use this to set a manual Meta Title |
| meta_description | Use this to set a manual Meta Description |
| meta_keywords | Use this to set your Meta Keywords |
| google_product_type |
Use this to override the Google Category assigned to this product
May be left blank
By default, this will inherit the setting in the Product's parent Category (the Category that this is taken from will be clearly listed here as 'default') |
| excludefinance |
Baskets that include this Product will not be permitted to checkout with finance (eCommerce) |
| allowvatremoval |
Enables the ability to exempt this Product from VAT, either in the POS or the CMS |
| option1 to 3 name |
Enter an Option Name for the Product
This will text match to an existing entry; if a matching entry does not exist, it will be created |
| option1 to 3 | Enter an Option Value for the Variant |
| related | Enter a comma delimited list of SKU codes as Related items |
| upsells | Enter a comma delimited list of SKU codes as Upsells |
| productaddons | Enter a comma delimited list of Addon SKU codes |
| prodid |
Export only
This will export the Product ID of the selected Product |
Mapping
You will need to map your data before it can be imported.
It is highly recommended that your import file should only include the columns for the fields that you are intending to edit, and nothing else.
Mistakes made here may have serious impact on your Product database.
Category Association
This may be used as an Import or an Export.
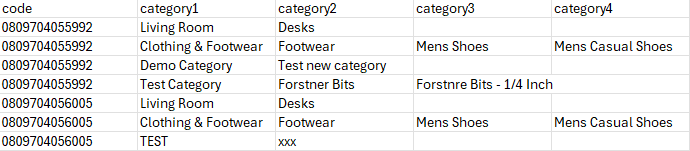
The file looks like this:
Export
Use the filters to narrow your selection, then click 'Export'. This will generate a file that will include all Customisations for products that match your filters.
Import
Make changes to the file and import it to update Products; this will update Category associations.
When exported, the file will include every Category association belonging to a Product; this may mean a single SKU code could be repeated over multiple rows. The file is split into multiple columns, with each part of the Category hierarchy having its own column.
On import, if the specific Category does not exist (text match), one will be created.
Then, if an association does not exist between the specificed SKU and Category, one will be created.
It is possible to create Categories in bulk using this import; be wary of typos, e.g. 'Sofa' and 'Sofas'
| Field | Purpose |
|
Code |
A SKU Code of the Product
There is no need to link every Variant of a Product; just one will do |
| Category1 |
The top level Category of this heirarchy |
| Category2 |
The second level Category of this heirarchy
Optional - if left blank, the product will only be added at the previous Category level |
| Category3 |
The third level Category of this heirarchy
Optional - if left blank, the product will only be added at the previous Category level |
| Category4 |
The fourth level Category of this heirarchy
Optional - if left blank, the product will only be added at the previous Category level |
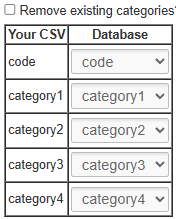
Mapping
You will need to map your data before it can be imported. Included below is the optimal mapping/spreadsheet structure.
Mistakes made here may have serious impact on your Product database.
If you check the box 'remove existing Categories', this will wipe all pre-existing associations from Products in your upload file.
Removing existing associations is dangerous, and may have a serious impact on your Product Database
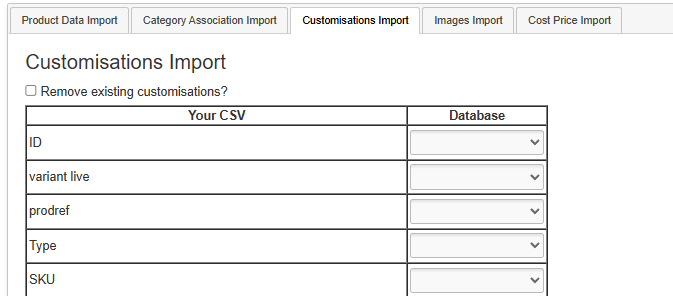
Customisations (AKA 'Made to Order')
This may be used as an Import or an Export option.
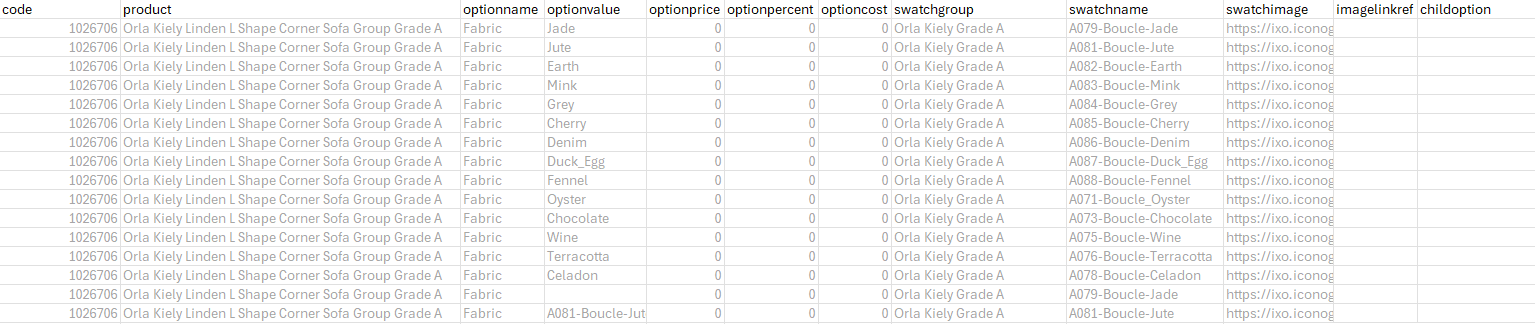
The file looks like this:
Export
Use the filters to narrow your selection, then click 'Export'. This will generate a file that will include all Customisations for products that match your filters.

Import
Make changes to the file and import it to update Products. Any changes here will be added to existing Customisations.
It is possible to remove existing Customisations when you upload a file by using he 'remove existing MTO options tickbox'.
Please be aware that removing Customisations in bulk is risky and could result in Customisations being removed incorrectly.
| Field | Purpose |
|
Code |
The SKU Code of the Variant to which the Customisations are linked |
| Product |
The Product Name to which the Customisations are linked - Variant Option Values are also appended to this, to differentiate between Variants
This is for reference purposes only, and changes here will not be updated within the system. |
| Option Name |
The Name associated with the Customisation, e.g. 'Size' or 'Colour'
Adding a new entry here may create a new Option |
| Option Value | The Value associated with the Customisation, e.g. 'Small' or 'Red' |
| Option Price |
The additional price to the customer associated with this Customisation, e.g. selecting 'Gold Feet' may add £49.99 to the price
Enter in this format only: '0.00' |
|
Additional value to be added to the Special Offer price of the Variant
This will only apply during a Special Offer period, as defined by the Variant
Enter in this format only: '0.00' |
|
| Option Percent |
The additional price to the customer associated with this Customisation, e.g. selecting 'Cotton' may add 10% to the price
Enter in this format only: '0.00' |
| Option Cost |
The additional cost associated with this Customisation, e.g. selecting 'Gold Feet' may add £49.99 to the price
Enter in this format only: '0.00' |
| Swatch Group |
The Swatch Group linked to this Customisation.
Adding a new entry here may create a new Swatch Group |
| Swatch Name |
The Swatch Group linked to this Customisation.
On upload, if a Swatch Name matching this entry exists within the Swatch Group (see above), that Swatch will be linked to this customisation.
Adding a new entry here may create a new Swatch |
| Swatch Image |
The link to the Swatch Image that is linked to this Customisation
If you are creating a new Swatch Group, or there is no Swatch with a corresponding Swatch Name within an existing Swatch Group, and you have entered a link here, it will import that Swatch Image and create a new Swatch |
| Image Link Ref | This shows a link to an existing Variant Image, if one exsists |
| POS Only | Toggles whether this particular Customisation Value is available to eCommerce Customers |
| Child Option | Use this to set up interrelated options, e.g. choices for 'Choose Pattern/Plain' could lead to Child Options of 'Choose Plain Colour' and 'Choose Pattern Colour' |
Mapping
You will need to map your data before it can be imported. Included below is the optimal mapping/spreadsheet structure.
Mistakes made here may have serious impact on your Product database.
Please be aware that removing Customisations in bulk is risky and could result in Customisations being removed incorrectly unless done with care.
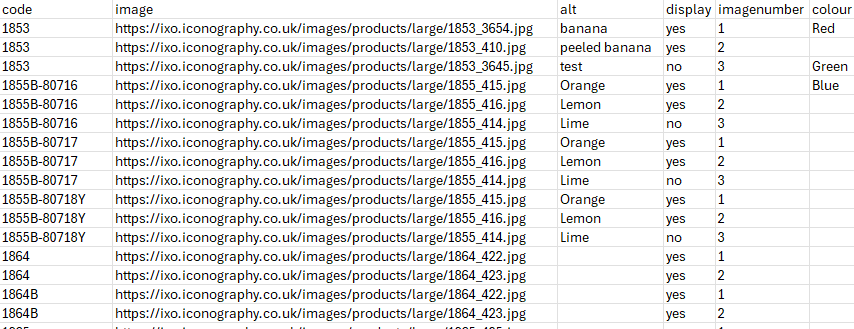
Images
This may be used as an Import or an Export option.
The file looks like this:
Export
Use the filters to narrow your selection, then click 'Export'. This will generate a file that will include all Images for Products that match your filters.
One Product may have multiple images, in which case these will be split over multiple lines.
Import
Make changes to the file and import it to update Products. If the image does not exist, a new one will be imported.
| Field | Purpose |
|
Code |
The SKU Code of the Variant to which the Images are linked |
| Image |
The link to the image.
If importing from a URL, enter the full URL, e.g. www.example.com/image.jpg
If importing from the server via FTP, just enter the image name, e.g. image.jpg |
| Alt |
The alt text for the image
Defaults to the image name if not entered |
| Display | Enter 'yes' or 'no' |
| Image Number |
Used for image sequencing
Enter a number
New images are added in the same order as the spreadsheet |
| Colour | Use this to link a Colour to the image for eCommerce Filters |
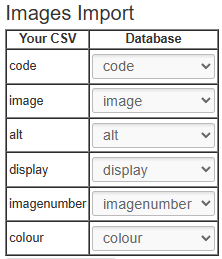
Mapping
You will need to map your data before it can be imported. Included below is the optimal mapping/spreadsheet structure.
Mistakes made here may have serious impact on your Product database.
Adding Images via FTP
Step 1: Preparing your images for upload
To use the IXO images CSV upload your image files are required to be in a single folder, it is also recommended that you name your image files as the product SKU to make Step 2 easier.
Example folder of product images prepared for upload:

Step 2: Creating the images CSV file
Fill out the example images CSV file provided by Iconography along with this guide as per the example line in the CSV.
Ensure the “image” field is filled with the file name and file type (png or jpg) exactly as it is in the folder you prepared in Step 1.
Step 3: Uploading your images
Upon opening FileZilla (free to download if not already using this system https://filezilla-project.org/download.php?type=client) you’ll see this screen.
The login fields are at the top to enter the details provided by Iconography along with this guide (contact us if you do not have logins).

After clicking Quickconnect, you’ll get this window and you just need to click ‘OK’ to confirm you trust the connection.

You’ll then be logged in and can see any image files already on the server on the bottom right box and files on your computer bottom left box.

Next in the bottom left box navigate to the folder you prepared in Step 1 on your computer. Then select all the images you’d like to upload and drag them into the bottom right box.
In the bottom window it will give you an overview of the progress of the file transfer.
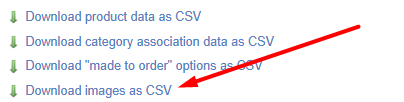
Step 4: Uploading the images CSV file
Upload your CSV via the CMS.
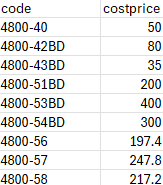
Cost Price
This may be used as an Import or an Export.
The file looks like this:
Export

Select a Supplier - this will export a list of all Variants whose Product has been linked to your selected Supplier.
Import
It is also possible (and may sometimes be preferrable) to use the Price Management tool, as this allows for rules based price management, as well as timed price updates
Make changes to the file and import it to update Variants. Any changes here will amend Cost Prices for that Variant.
Changes here will not update the landed cost of existing units of stock; these figures are used for new Purchase Orders and for calculating default margins on Sales Orders.
| Field | Purpose |
|
Code |
The SKU Code of the Variant |
| Cost Price |
The Cost Price for the Variant |
Mapping
Your file will not need mapping; it just needs two columns:
| code | cost price |
When uploading your file, you will need to select the Supplier to which the prices should be applied.
If you select a Supplier that is not associated with the Products in your file, new associations will be created.
Mistakes made here may have serious impact on your Product database.