Supplier Returns
Summary
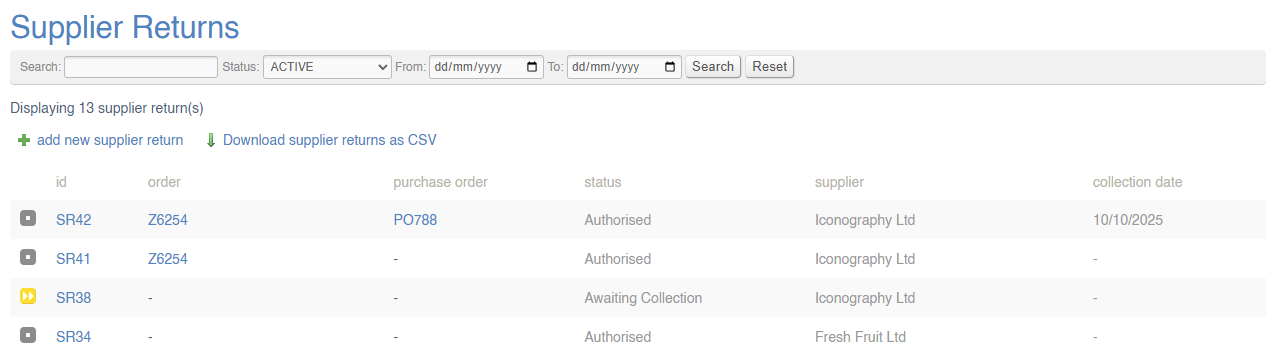
From this screen, you can create, view and manage Supplier Returns.
A Supplier Return is a fully audited way of removing stock from the system. This will allow you to take stock in an unavailable location, and have a process that removes that stock and tracks those changes both in Supplier Returns and the Stock History report.
Supplier Returns may also be created via the Returns screen, or via the Sales Order Detail screen
These may be exported as a CSV.
Key to icons
 = requested
 = authorised
 = awaiting collection/credit
 = completed
 = cancelled
Note: 'awaiting collection' Supplier Returns are those which are awaiting the stock unit to be collected by a Supplier; the 'awaiting credit' status is an additional step between 'awaiting collection' and 'completed'. While in this status, a user is only able to mark the Supplier Return as completed, or alternatively to add notes. It is intended that this be used to manage and track any Supplier Returns which are due credit notes, refunds or other forms of reimbursement from the Supplier.
Creating a new Supplier Return
Click here for a full guide on how to create a new Supplier Return.
Supplier Return Management
To manage a Supplier Return, click on the SR number.
For more information, click here.
Supplier Return (Detail)
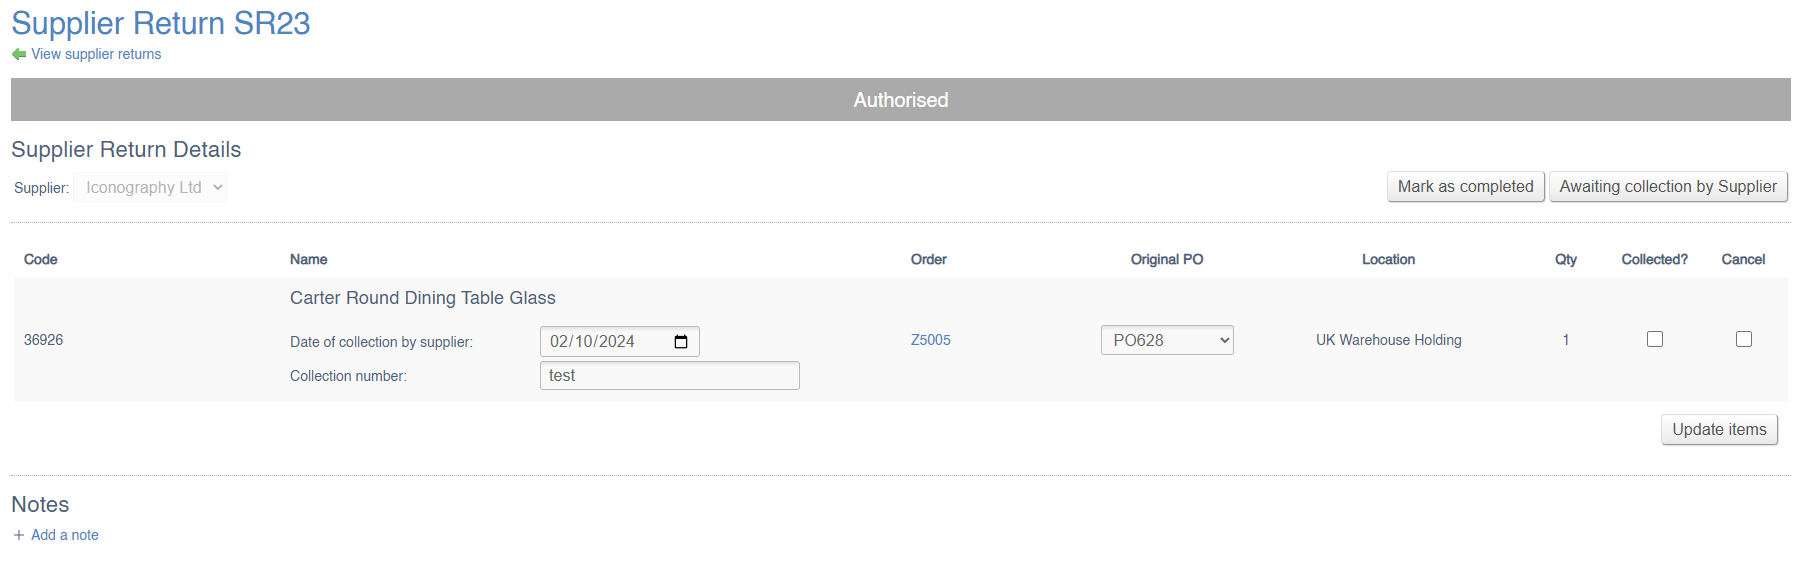
Use the tick boxes to process the Supplier Return line item (it is possible to have multiple items on a single Supplier Return)
| Field | Purpose |
| Date of Collection by Supplier | This will output in the Logistics report |
| Collection Number | For reference purposes only |
| Original PO |
If the Stock in the location is linked to a Purchase Order, that Purchase Order Id will be preselected
If there are multiple units of the same SKU in the same location, you will have to select the relevant Purchase Order item |
You can also add Notes and Tasks to Supplier Returns
Creating a Supplier Return
This guide shows how to create and manage a Supplier Return via the Supplier Return section of the CMS; Supplier Returns may also be created via the Returns screen, or via the Sales Order Detail screen
1. Click "Add new supplier return add new supplier return"

2. Click to select Store and Location

3. Optional: Filter by Supplier

4. Select the items to return, and adjust the quantities accordingly

Quantities will default to the total number of units in the Location
5. Click to create the Supplier Return

6. If necessary, select the Purchase Order linked to the SKUs

7. Click "Update items" to save your changes

8. The next stage will rely on your Supplier, who will either Authorise or Decline the Supplier Return.
Once they confirm, use the buttons at the top of the Supplier Return to process it accordingly.
9. Click "Authorised by Supplier"

10. Once authorised, please confirm a collection date; this will display on your Logistics report.
11. Click "Wednesday 26 November 2025"

12. Click "Update items" to save your changes

13. Click "Awaiting collection by Supplier"

14. Click "enter collection number" if required

15. When you are ready, mark the stock a collected
16. Click "Stock collected"
