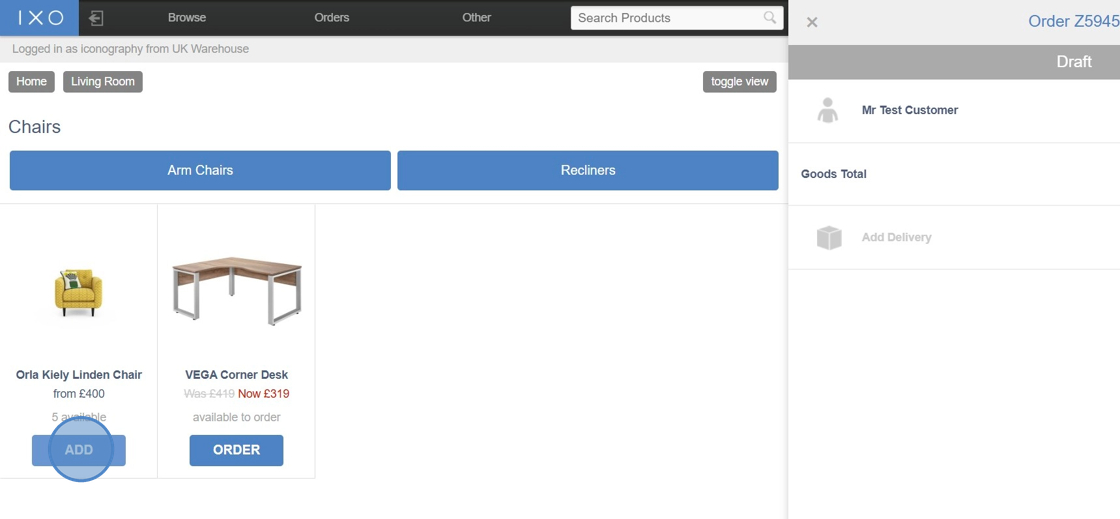
Adding a Product to a Sales Order in the EPoS
There are three methods of searching for, and ultimately adding, products to an order in the EPoS;
- Search field.
- Browse Products.
- Barcode scanners.
Search Field
You can easily search for a product by entering an appropriate term or SKU in to the "Search Products" field. This will return suggested results as you type, or you can hit return to see all of the results.
Browse Products
Under "Browse Products" you will be able to browse through your categories (listed in blue boxes), just as a customer would on the front end of your site. From here you can enter the appropriate categories and sub-categories to find the appropriate product that the customer wishes to purchase.
You can browse through categories by hovering over "Browse" in the EPoS navigation bar at the top. This is essentially the same as browsing using the blue category boxes.
Barcode Scanners
If you have barcode scanners, these will allow you to scan the product that the customer wishes to purchase, which will automatically add the product to the order, without having to search for it.
Adding a Product
1. Choose the category you wish to search in.

2. Choose the sub-category you wish to search in.

3. You may wish to search within further sub-categories, or you can simply add click "ADD" on a product within the chosen category.

4. From here you will be able to select the from the available variants, as well as any Unique Stock Records (USR) that are currently available from stock.

5. Selecting a variant will allow you to proceed to choose from the available options.

6. The final step will be to add any custom options. If no custom options are required, click "add".

7. The product has now been successfully added to the order.

Product availability is detailed within the EPoS. For a full explanation of this terminology, please click here.