
How to Assign Overlays to Products in Bulk
Overlays can be assigned in bulk to products using the Overlay Rules tab as follows:
Products can have one Overlay assigned per position (Top Left, Top Right, Bottom Left, Bottom Right, Below Product). When assigning an Overlay, keep in mind that it may not show on products where an Overlay is already assigned to the same position.
1. Navigate to your CMS.
2. Click "Product Overlays" under Catalogue.

3. Add a new Overlay, or click the edit icon to go in to an existing one. In this case we are choosing "Black Friday Sale".
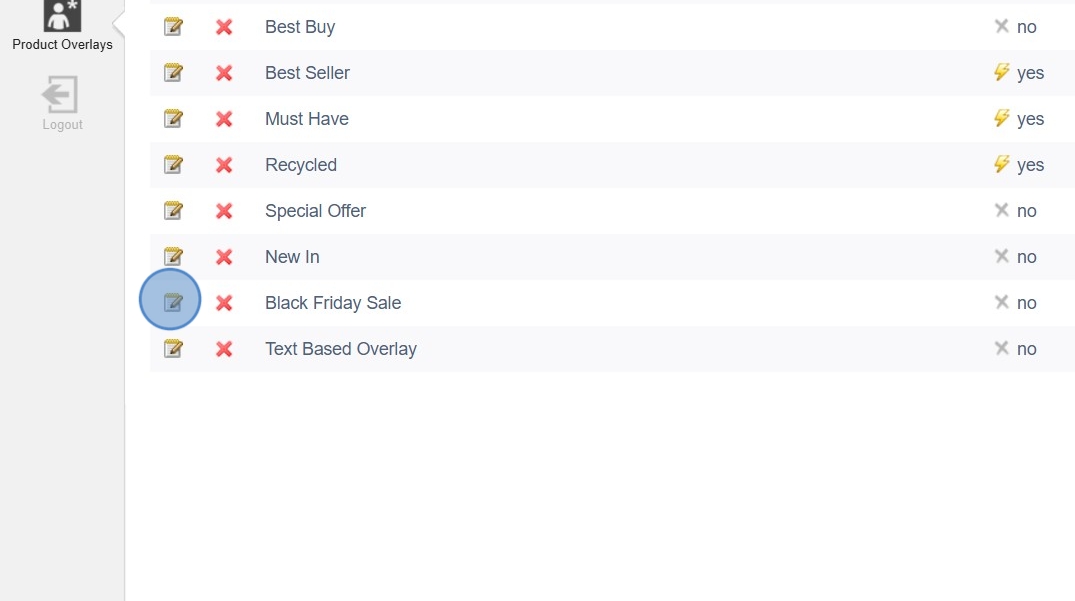
4. Once an Overlay has been added, the "Overlay Rules" tab will become visible. Click the tab to open the rules.

5. You can select multiple criteria to ensure that the Overlay is assigned to the appropriate products. In this instance we are choosing to the display the Overlay against all products that are currently "In stock". This is dynamic, so if stock arrives for a product that previously had no stock, the Overlay will then be applied.

Category Feature Product - any product marked as a feature product from within the product screen.
Home Page Product - any product marked to show on the home page.
In stock - any product that currently has stock allocated to it.
Best sellers above X sales rank - any product that is performing above a set rank in terms of sales.
Has an active sale price over X% - any product that has a sales price greater than the chosen percentage.
Added within X days - any product that has been added to the CMS within the set number of days.
6. You may wish to assign the Overlay to specific categories, brands and/or collections. You can also assign to specific attributes that are assigned to products (colour, size etc).
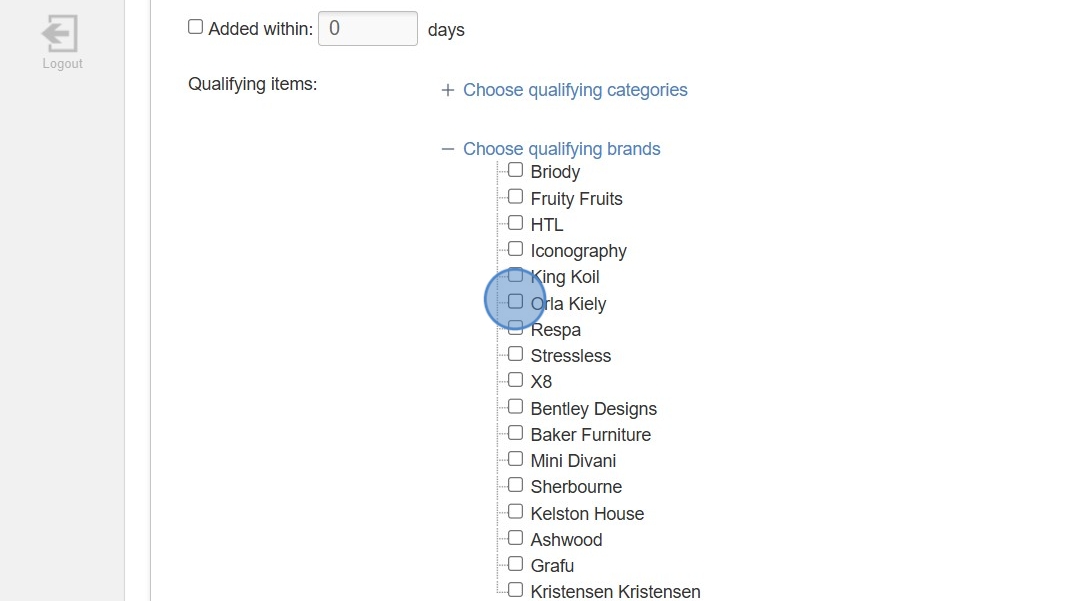
Please note that where parent folders exist, ticking to assign an overlay to the parent folder will assign it to everything included in all child folders also. You may wish to assign at a more granular level by assigning to child categories.
